Table of contents
Overview
PMI-XFORCE-2023 is an Aircraft Phase Maintenance Project Management system that allows the organization to schedule, monitor, adjust, and analyze multiple maintenance phases over the year.
The application is built using:
- React and JavaScript for component-based UI implementation and routing.
- MongoDB for database
User Guide
This section provides a walkthrough of our interface and its current capabilities. The screenshots show the current state of the project.
Landing Page
 Start Here will lead to sign in page.
SignUp Page
 User will sign up with default access level of AL0 which will need the Admin or AL3 to change after sign up.
SignIn Page

Admin User Pages
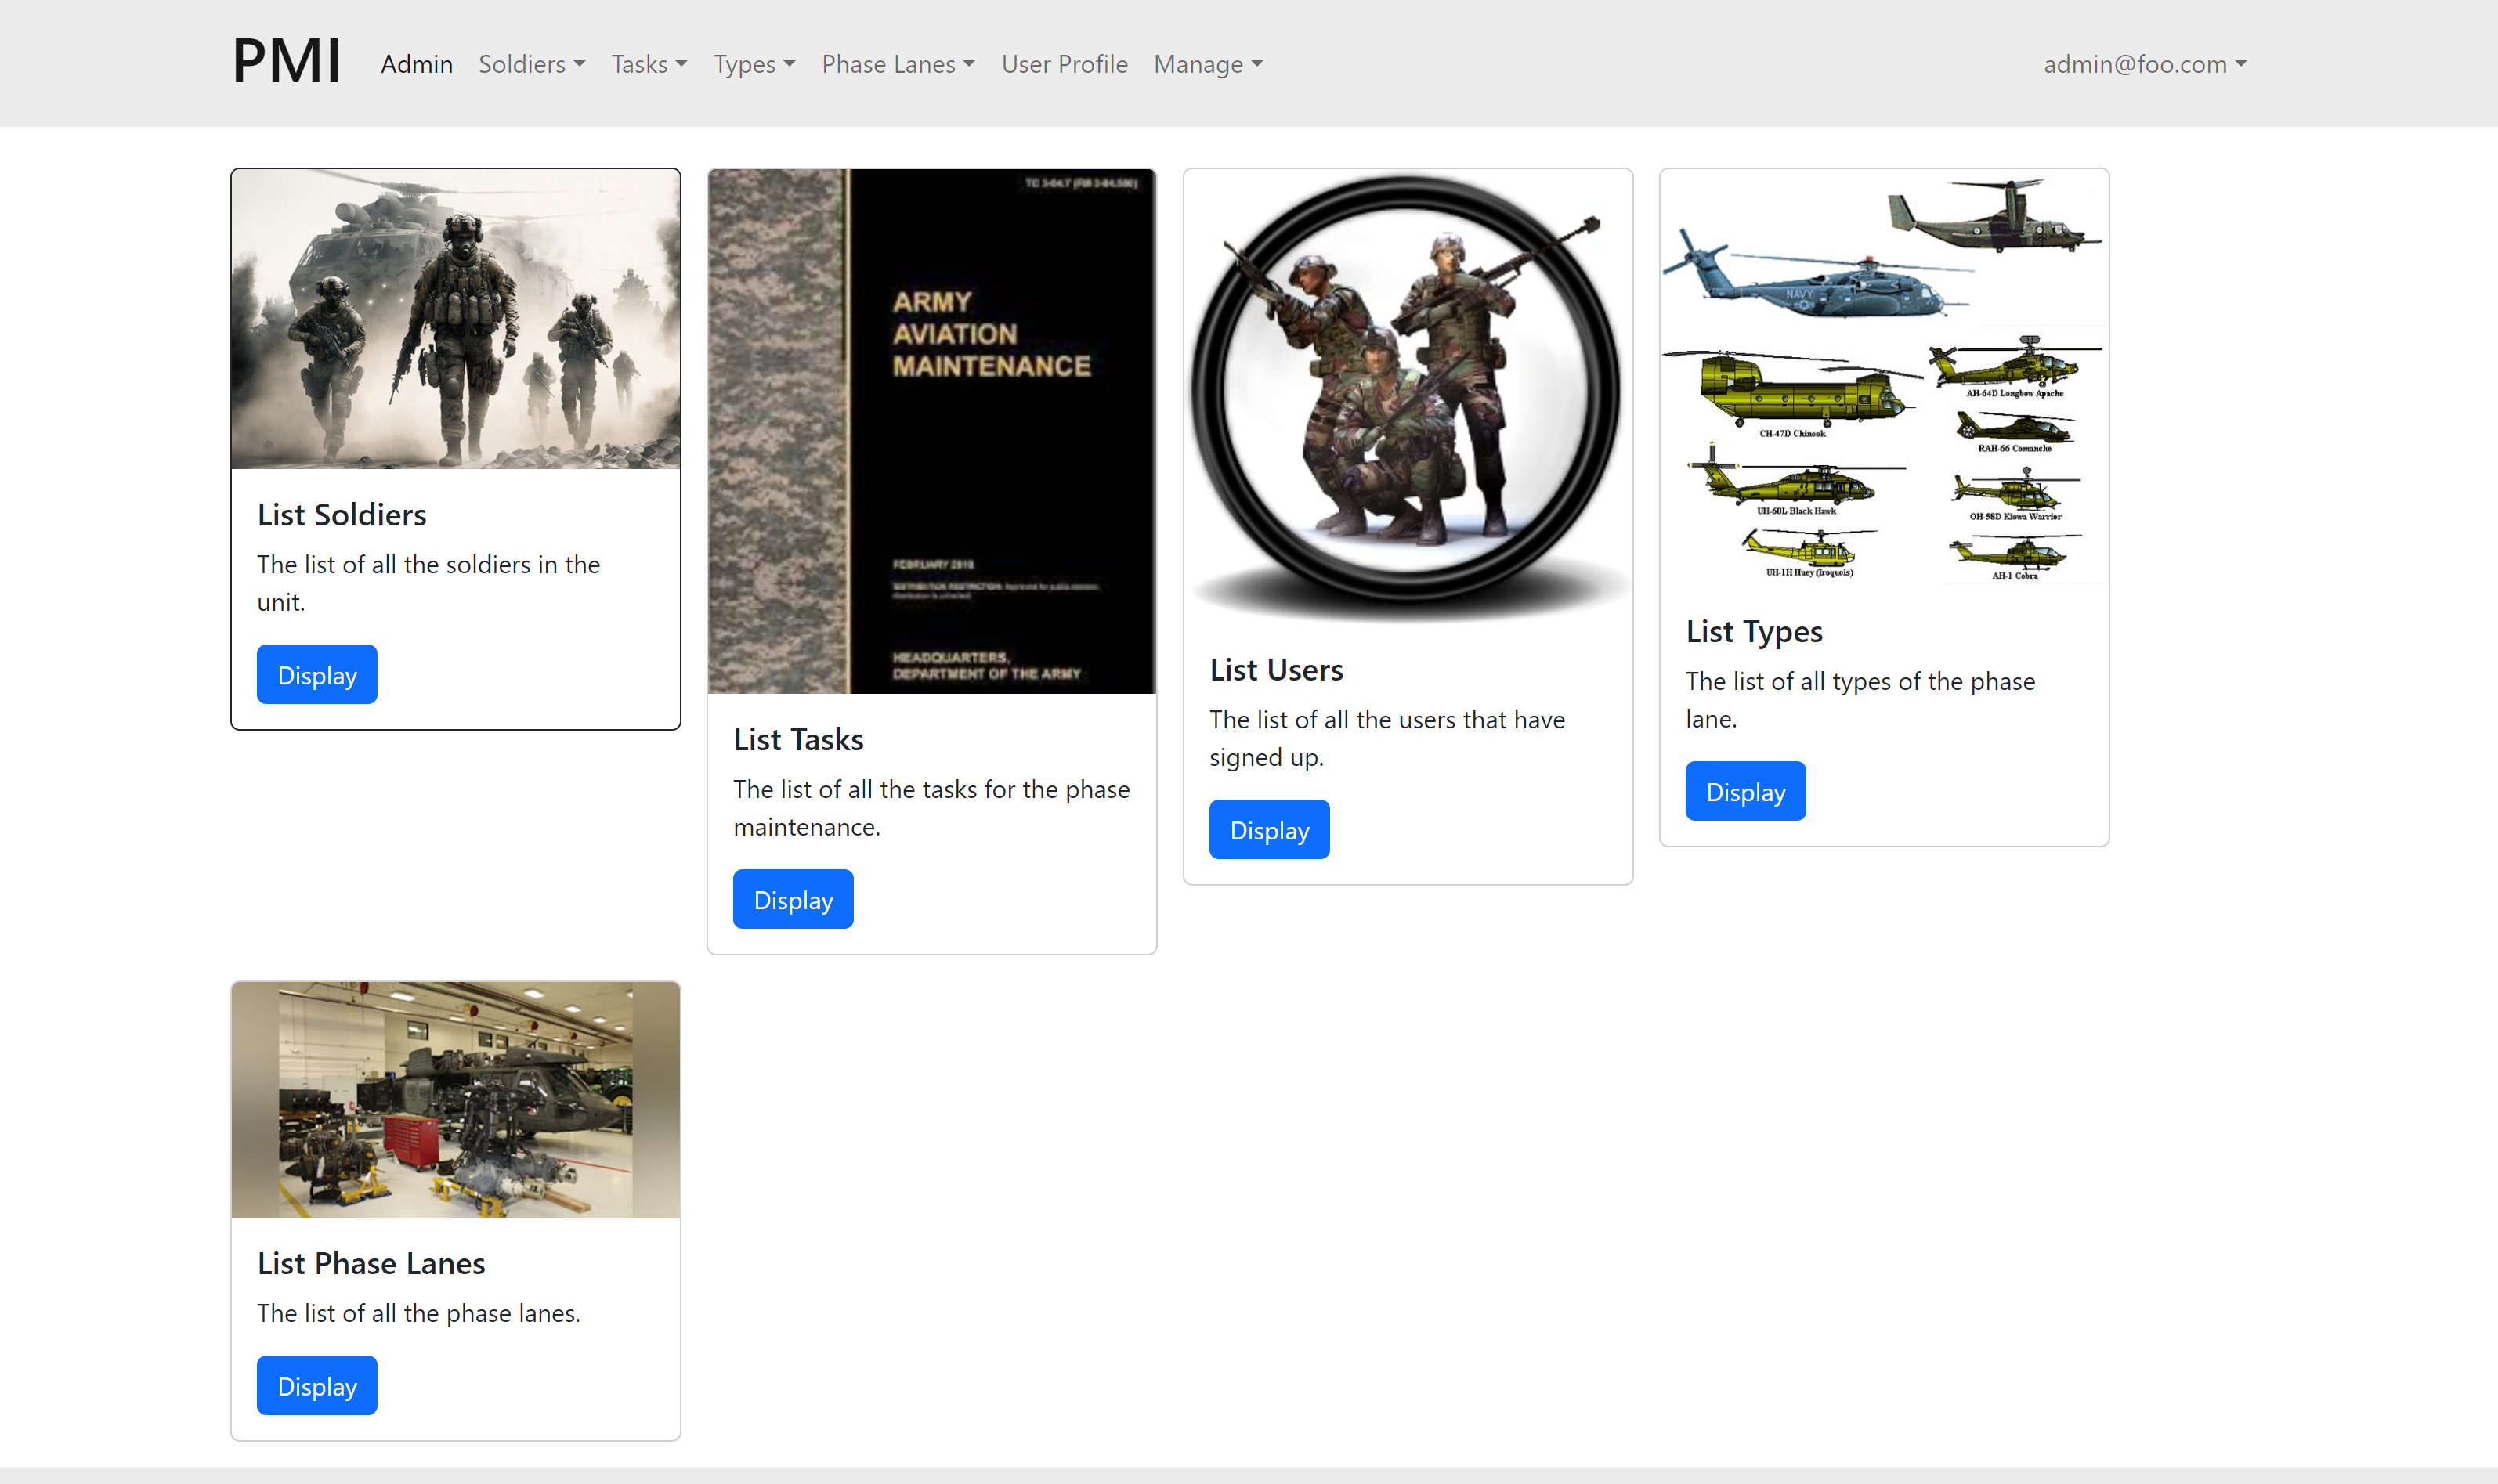 Admin is mainly to manage the database, adding, editing, removing different data points and assign different access level to users.
General User Pages (with access level 0)
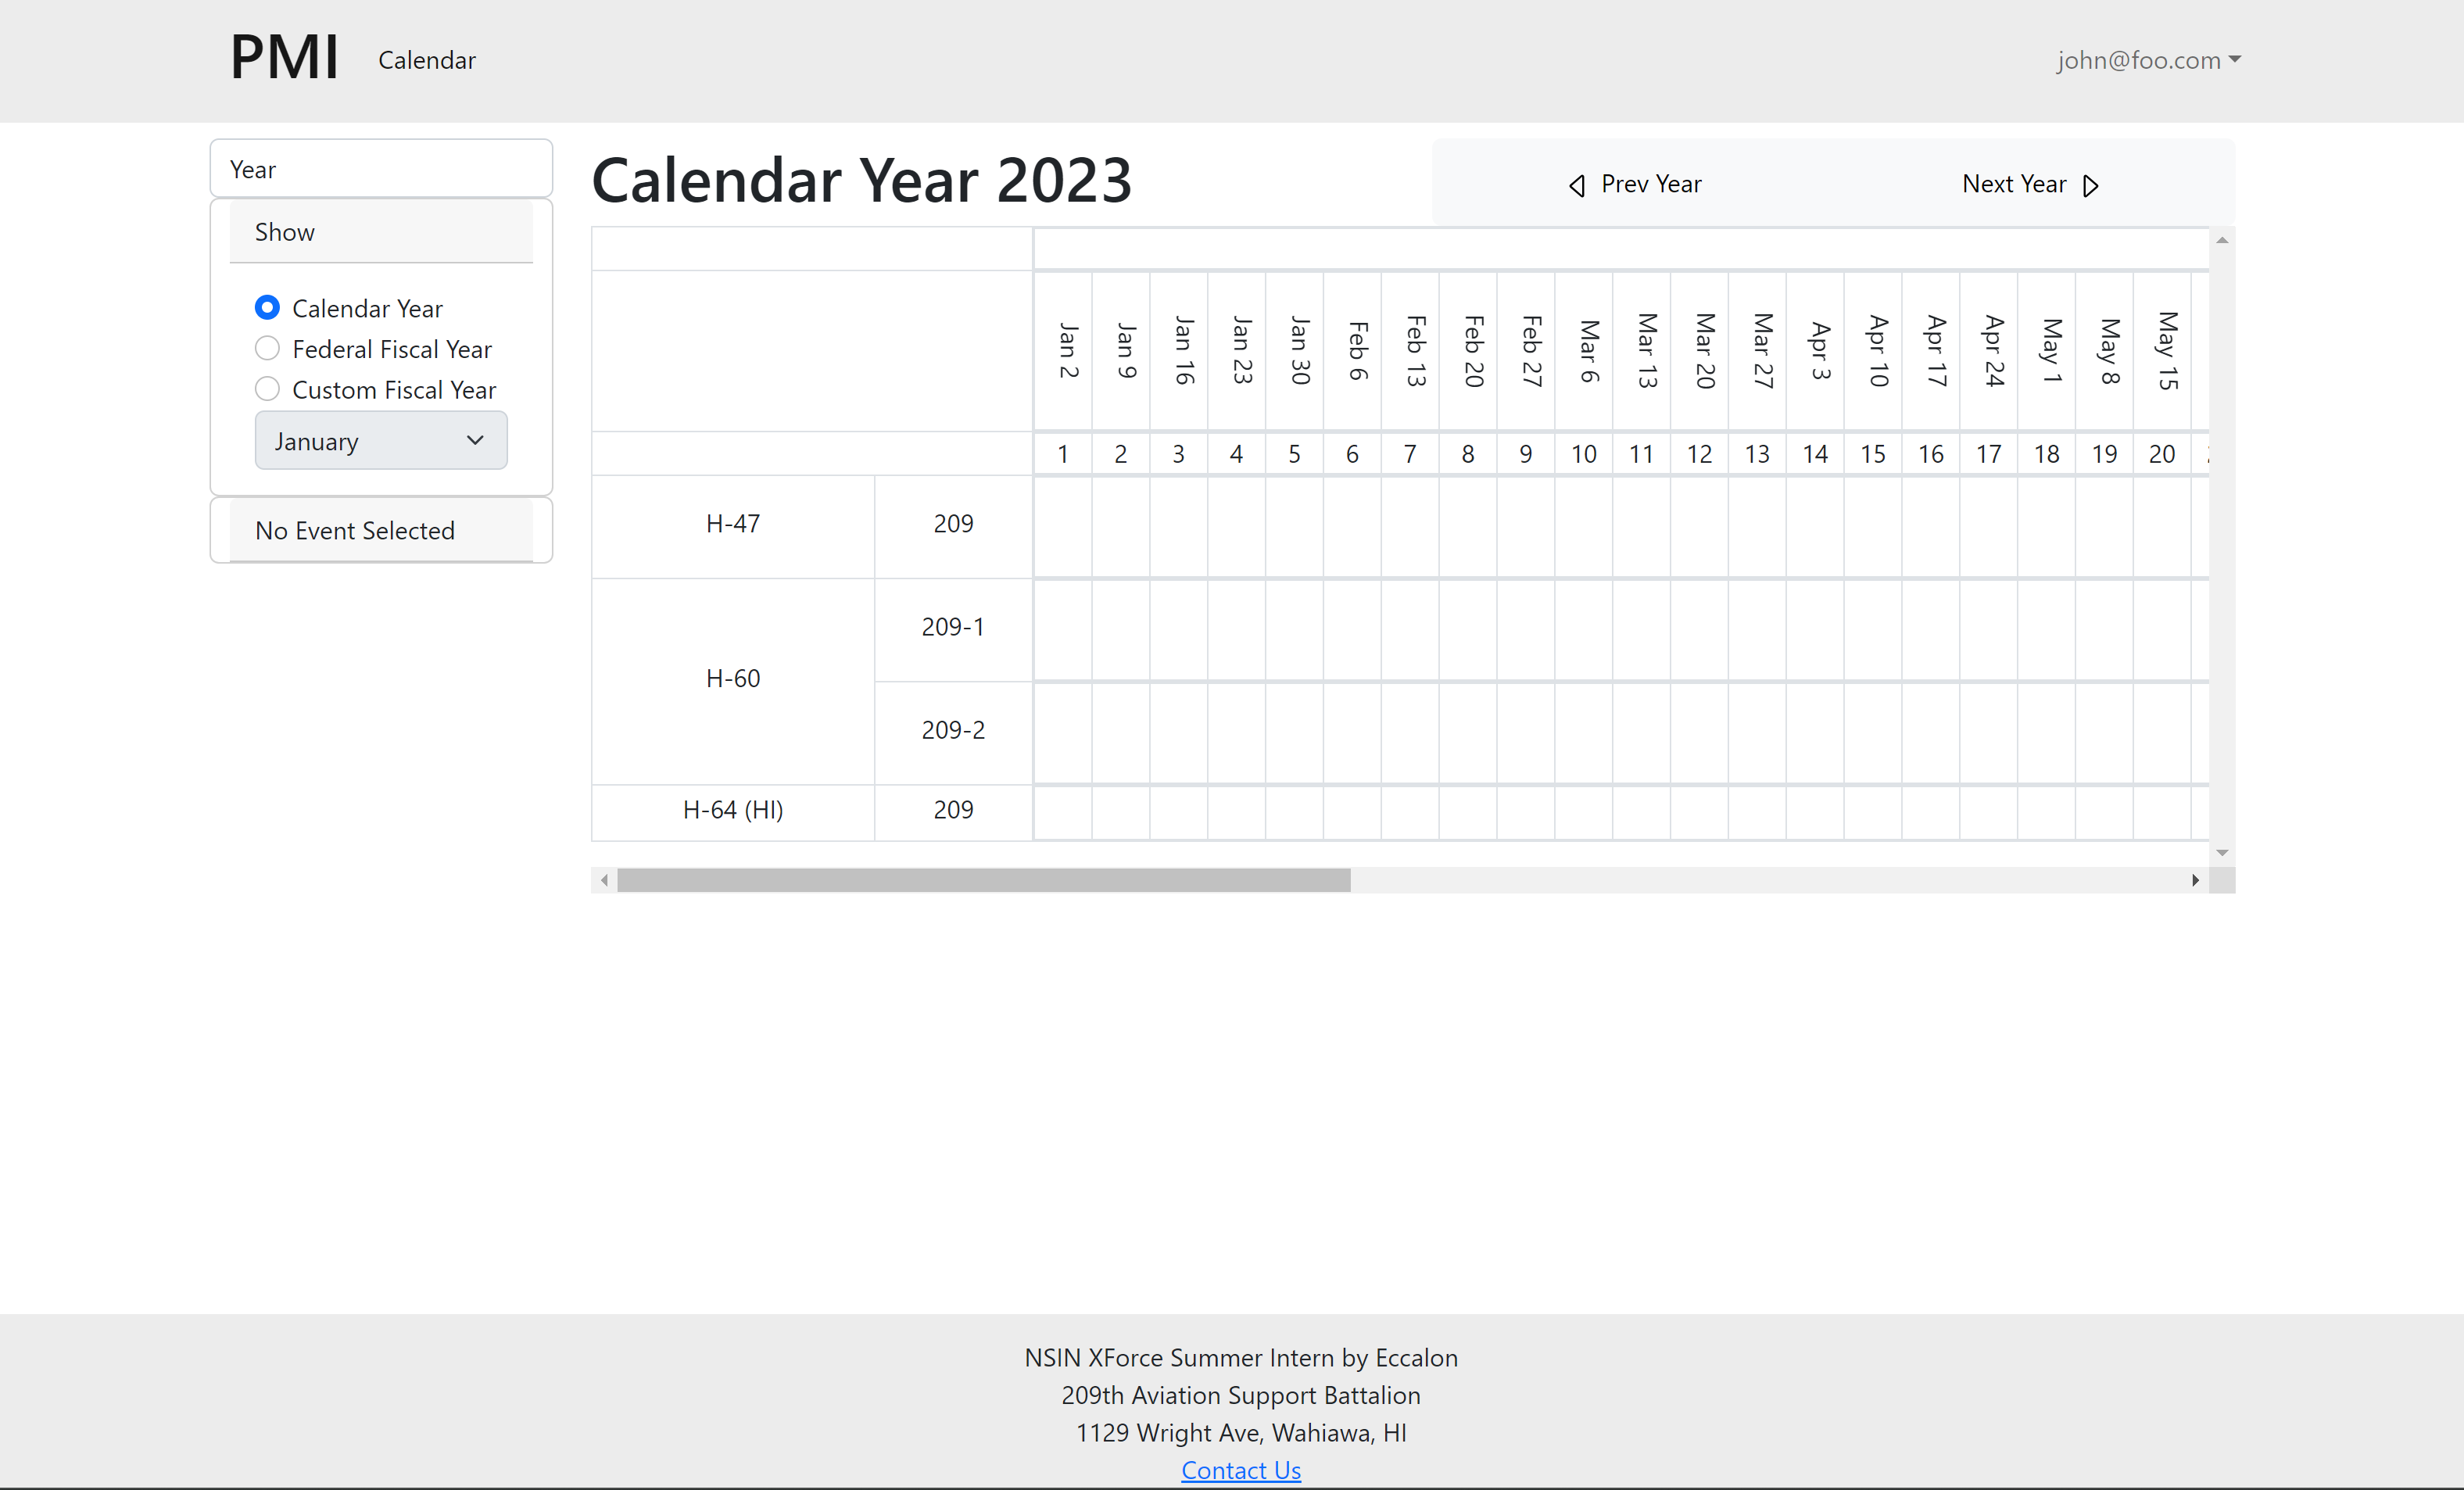 General User that only has access level 0 will allow to view the calendar only.
AL1 User Pages
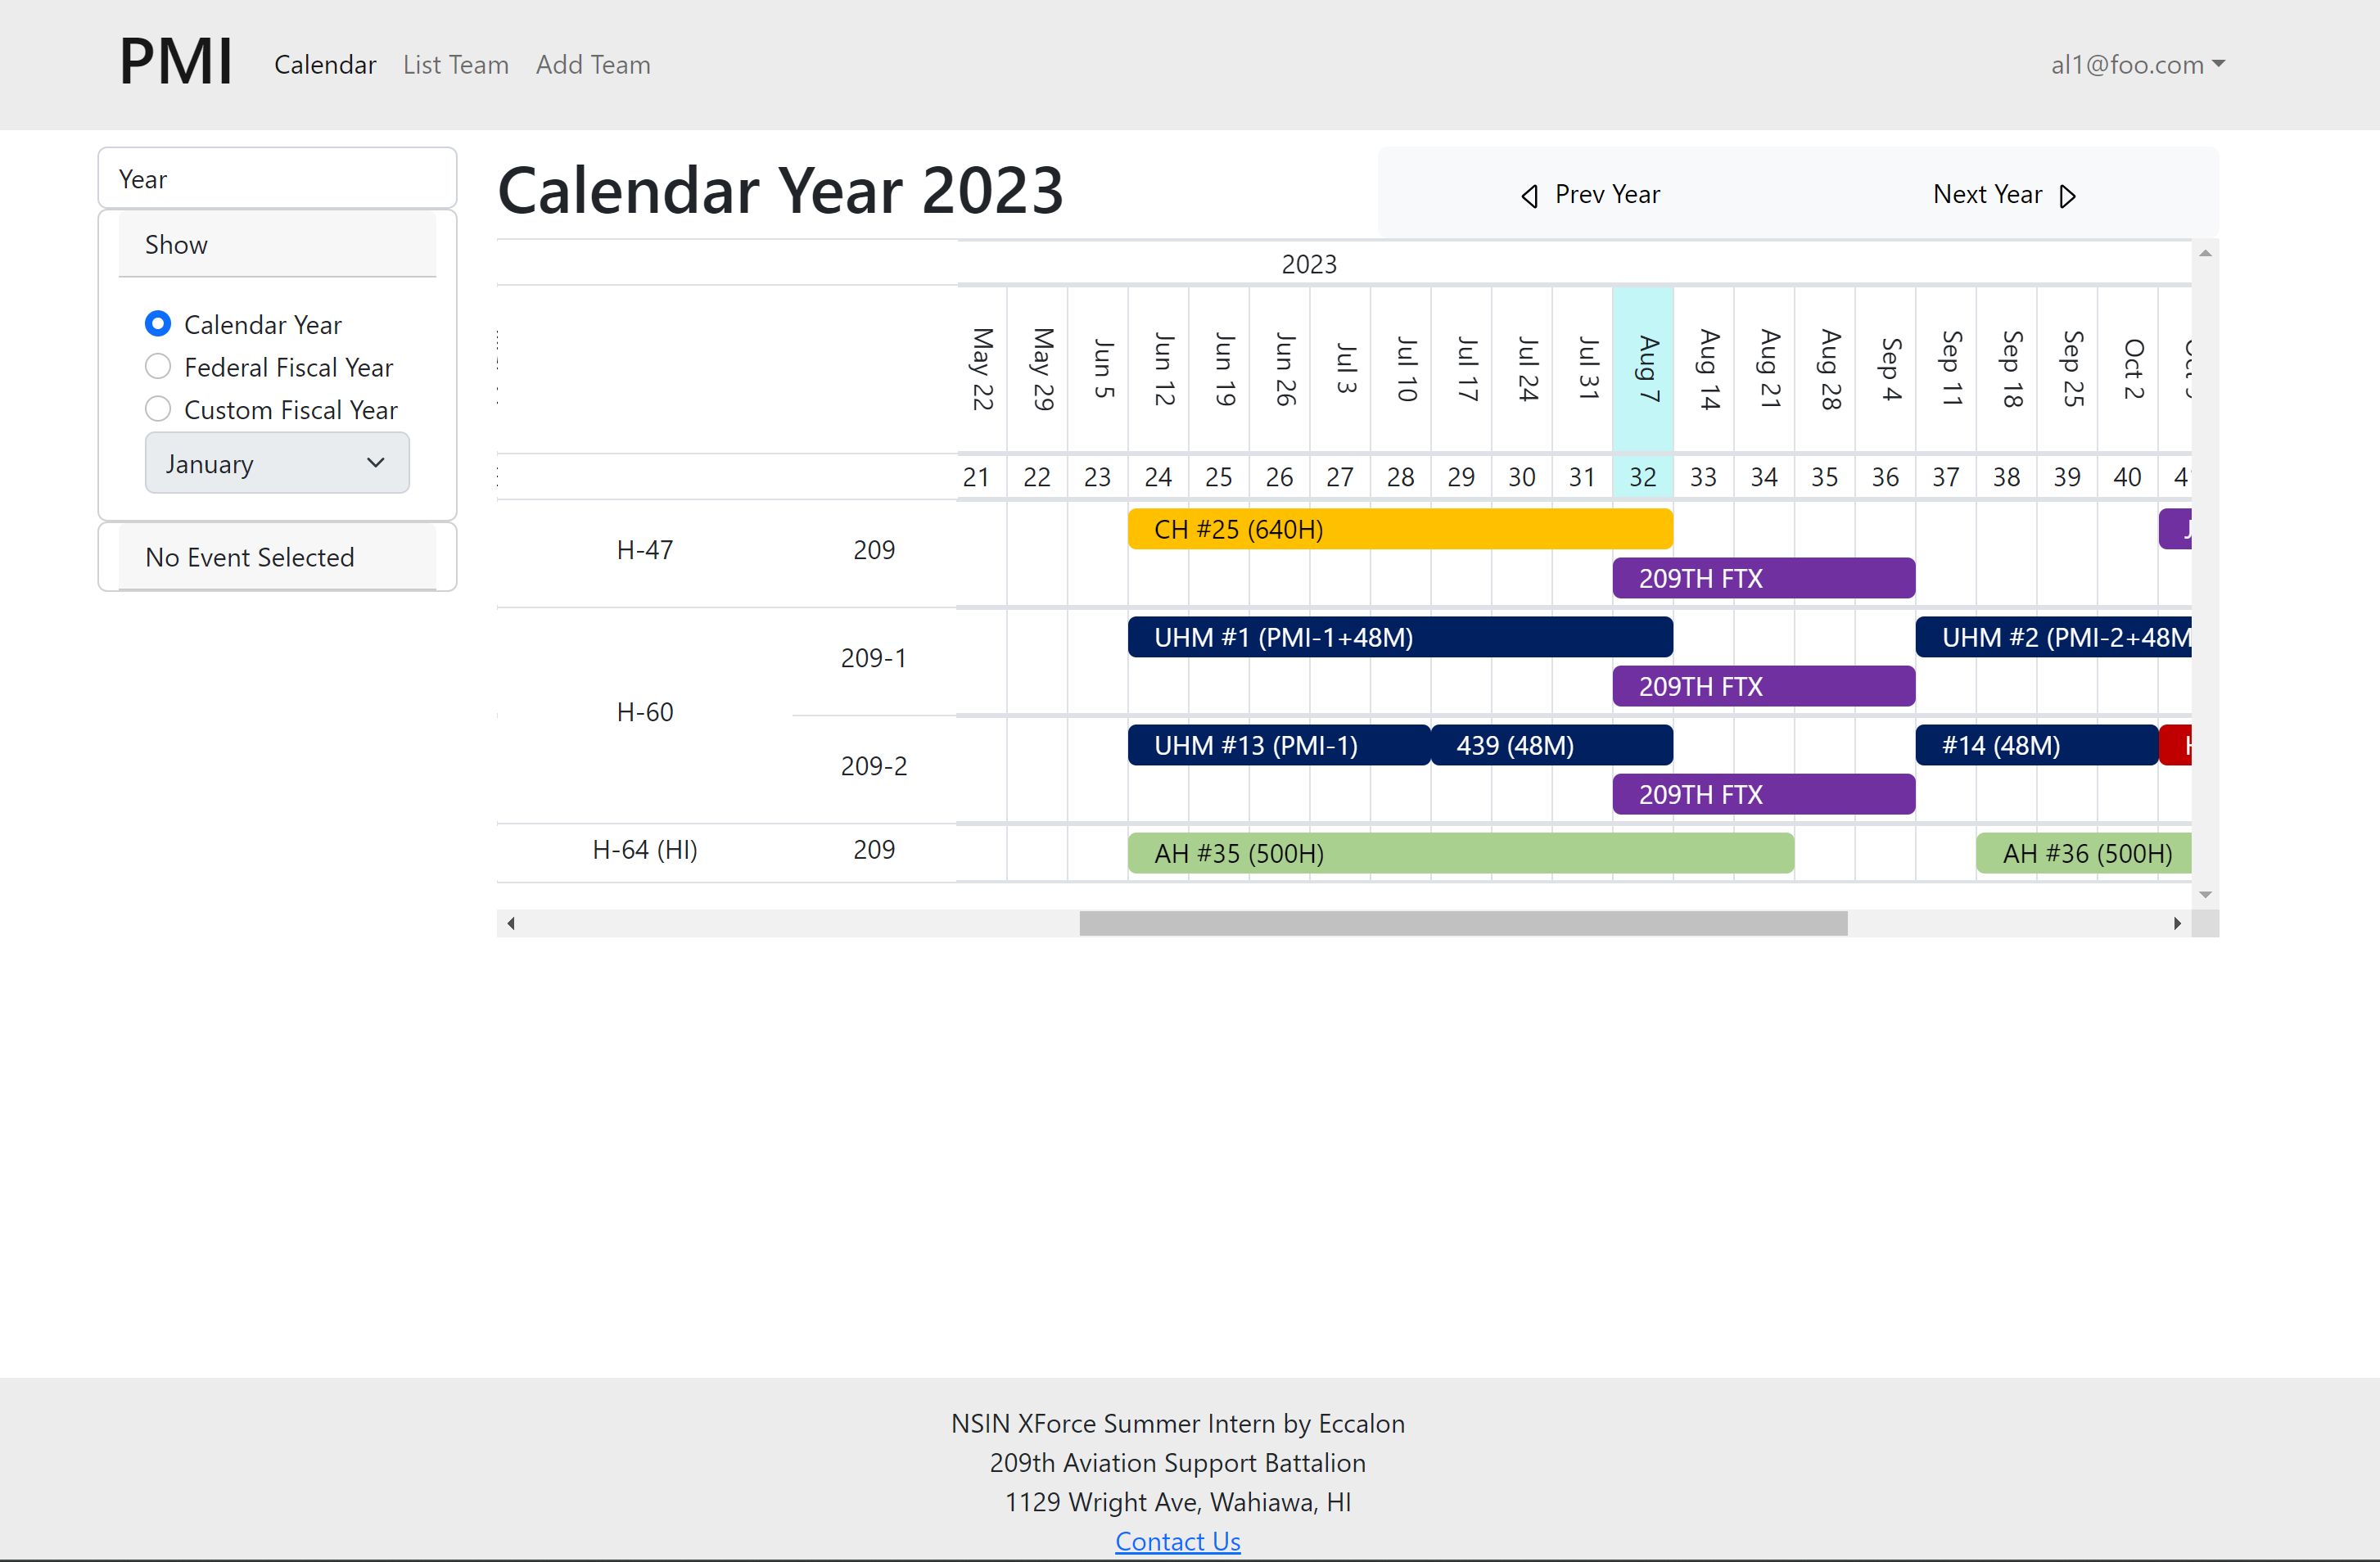 Access level 1 user can create a team and list all team members.
AL2 User Pages
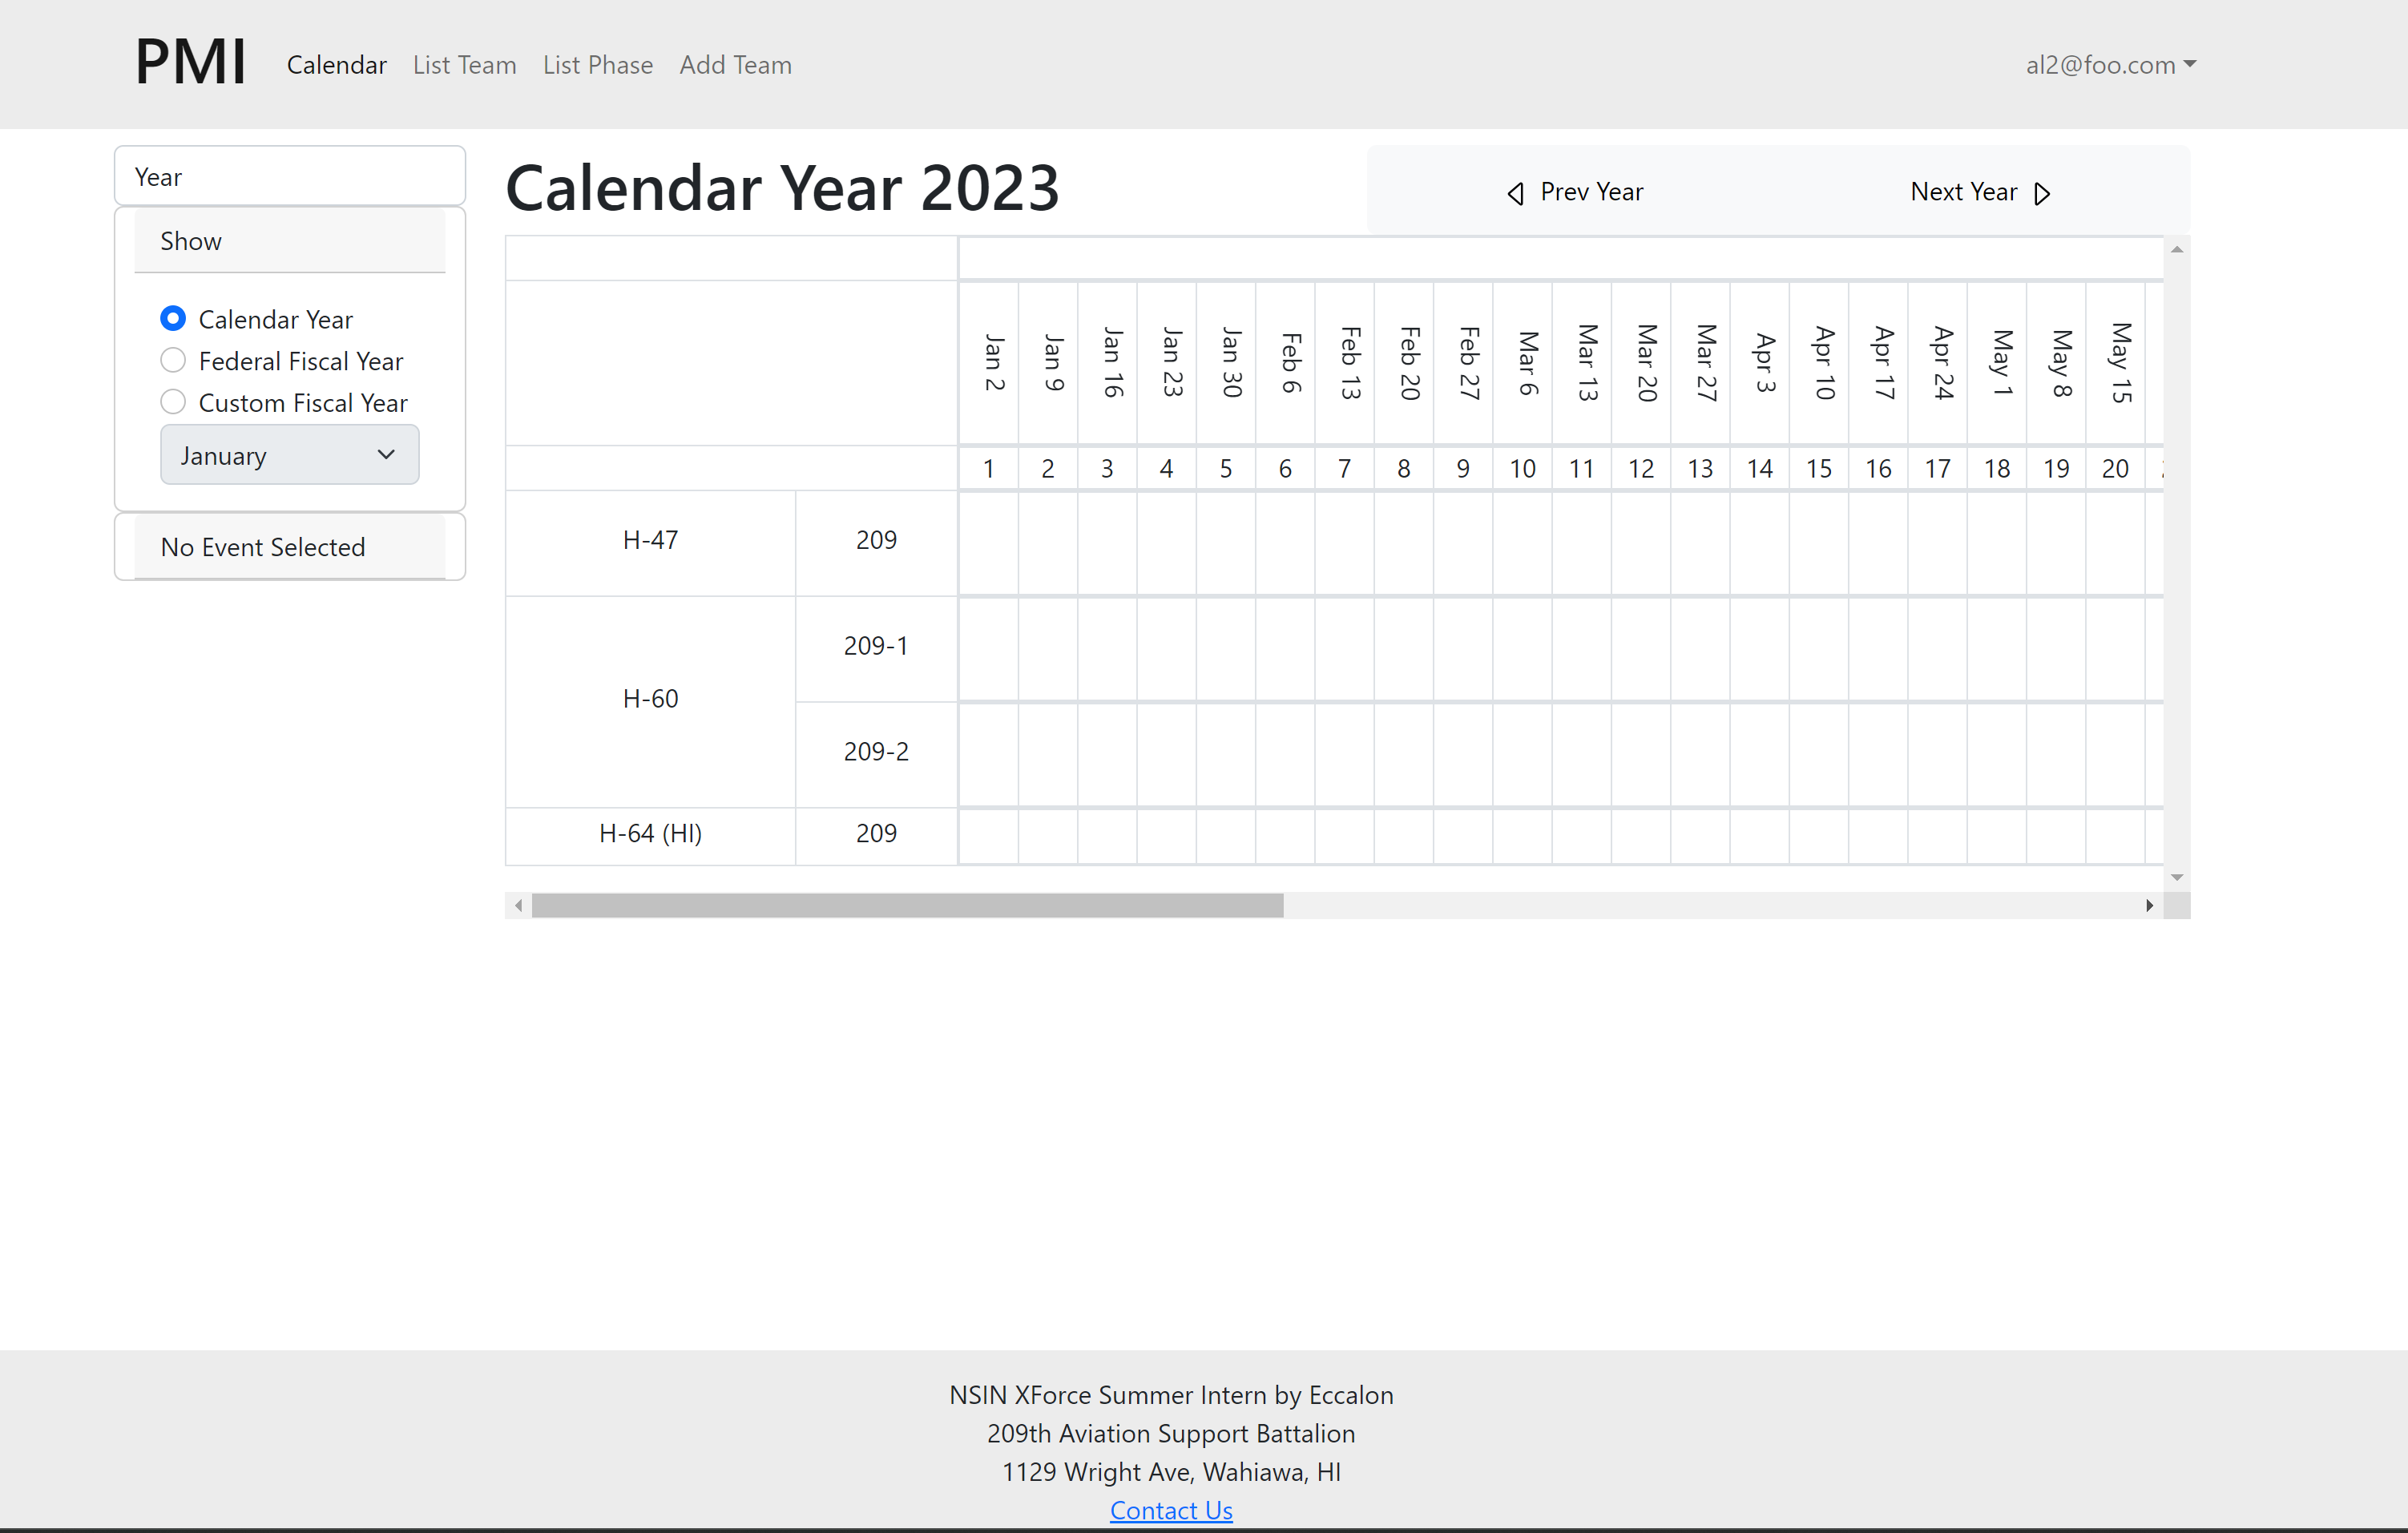 Access level 2 user can also edit and list the phase lanes
AL3 User Pages
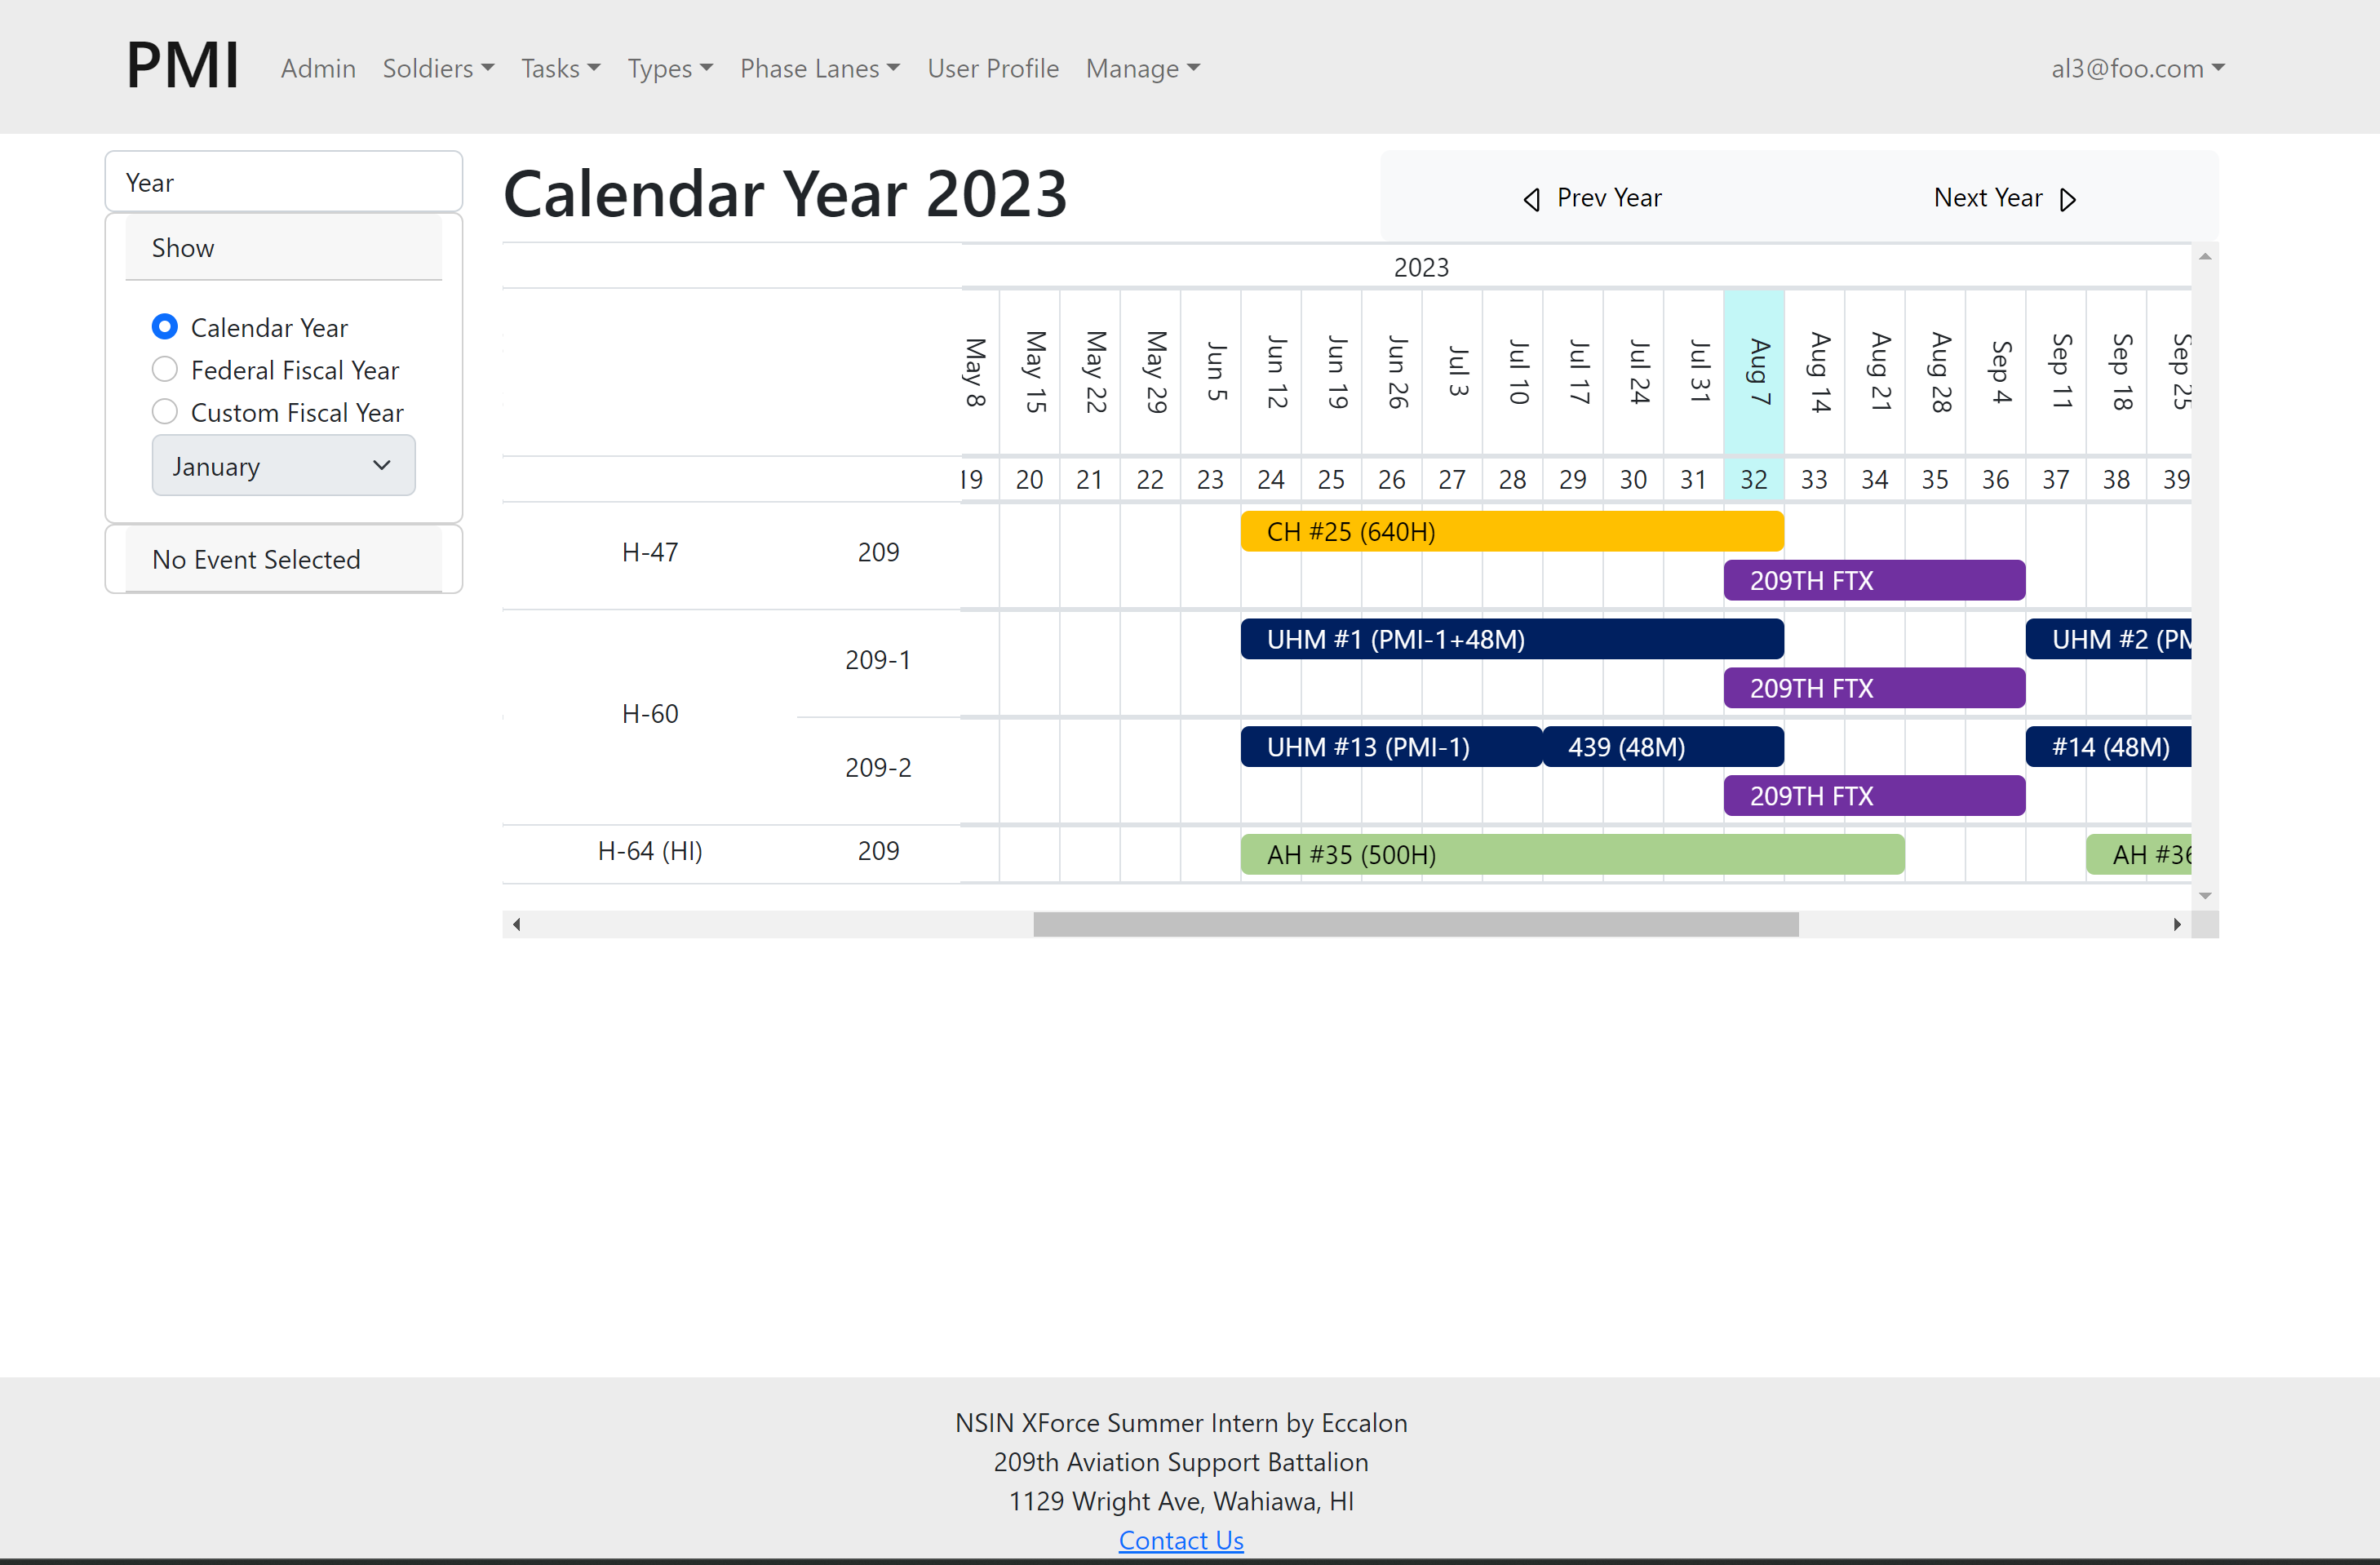 Access level 3 user have all the admin access.
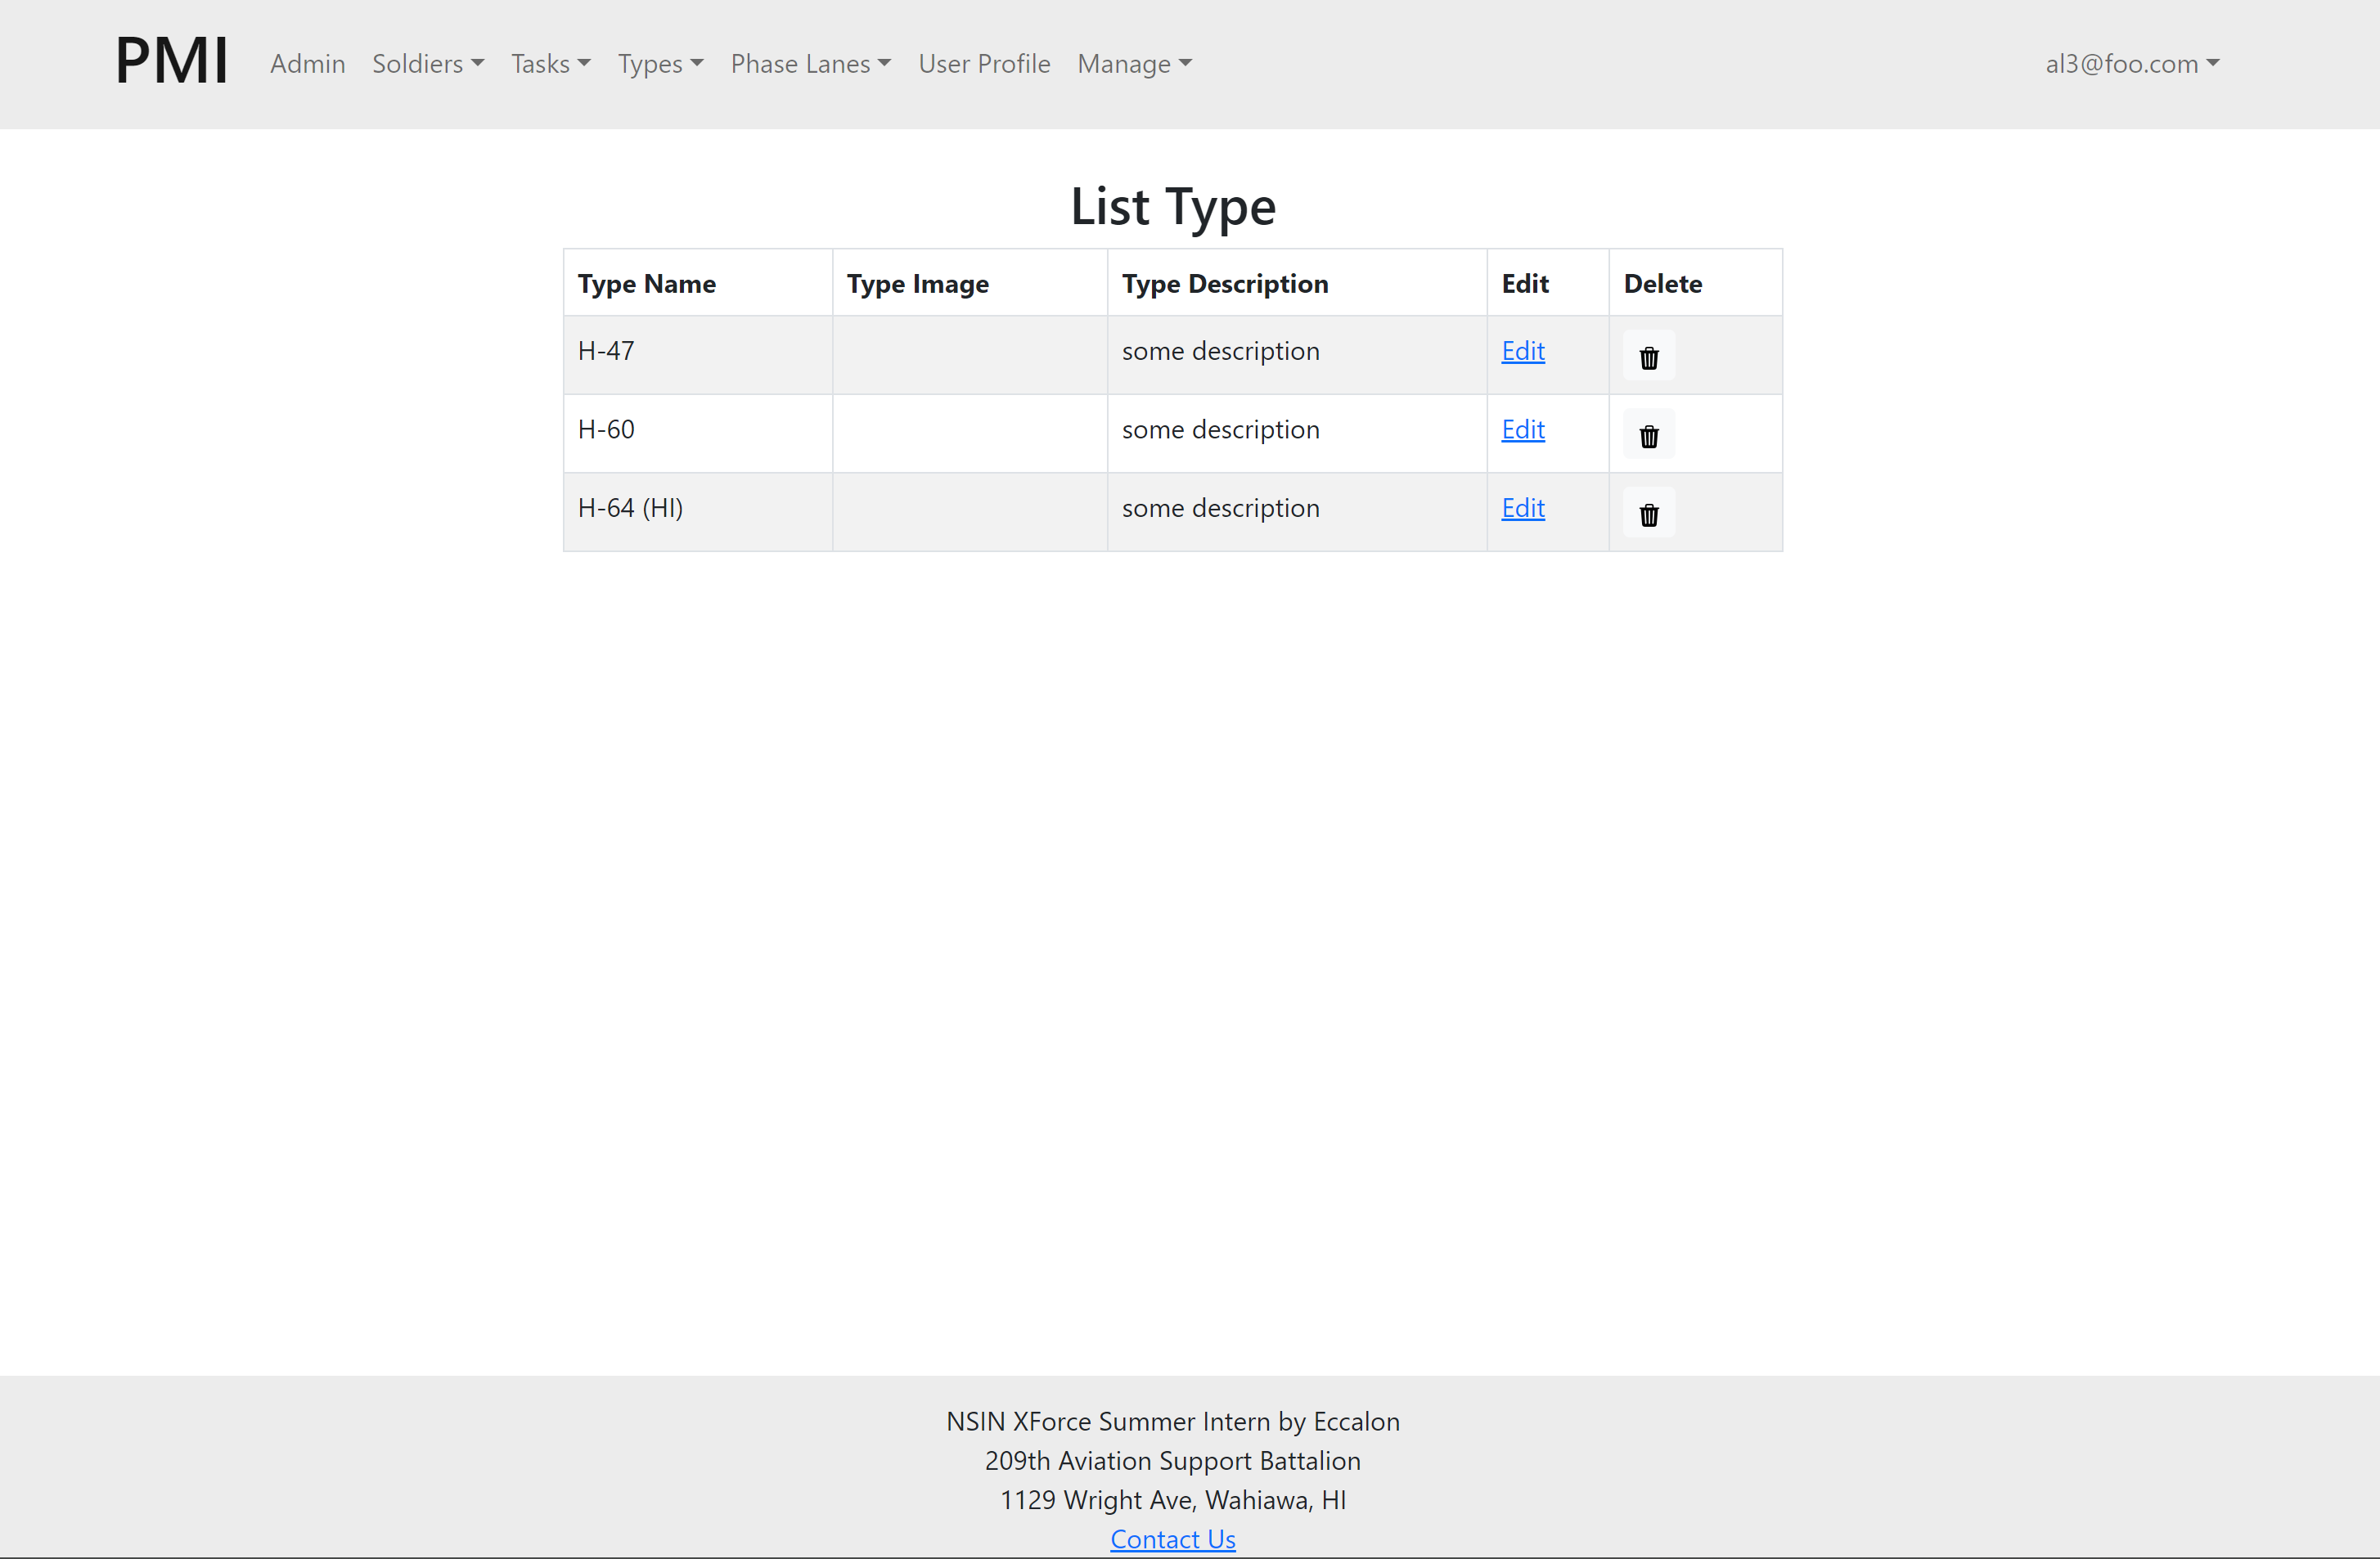
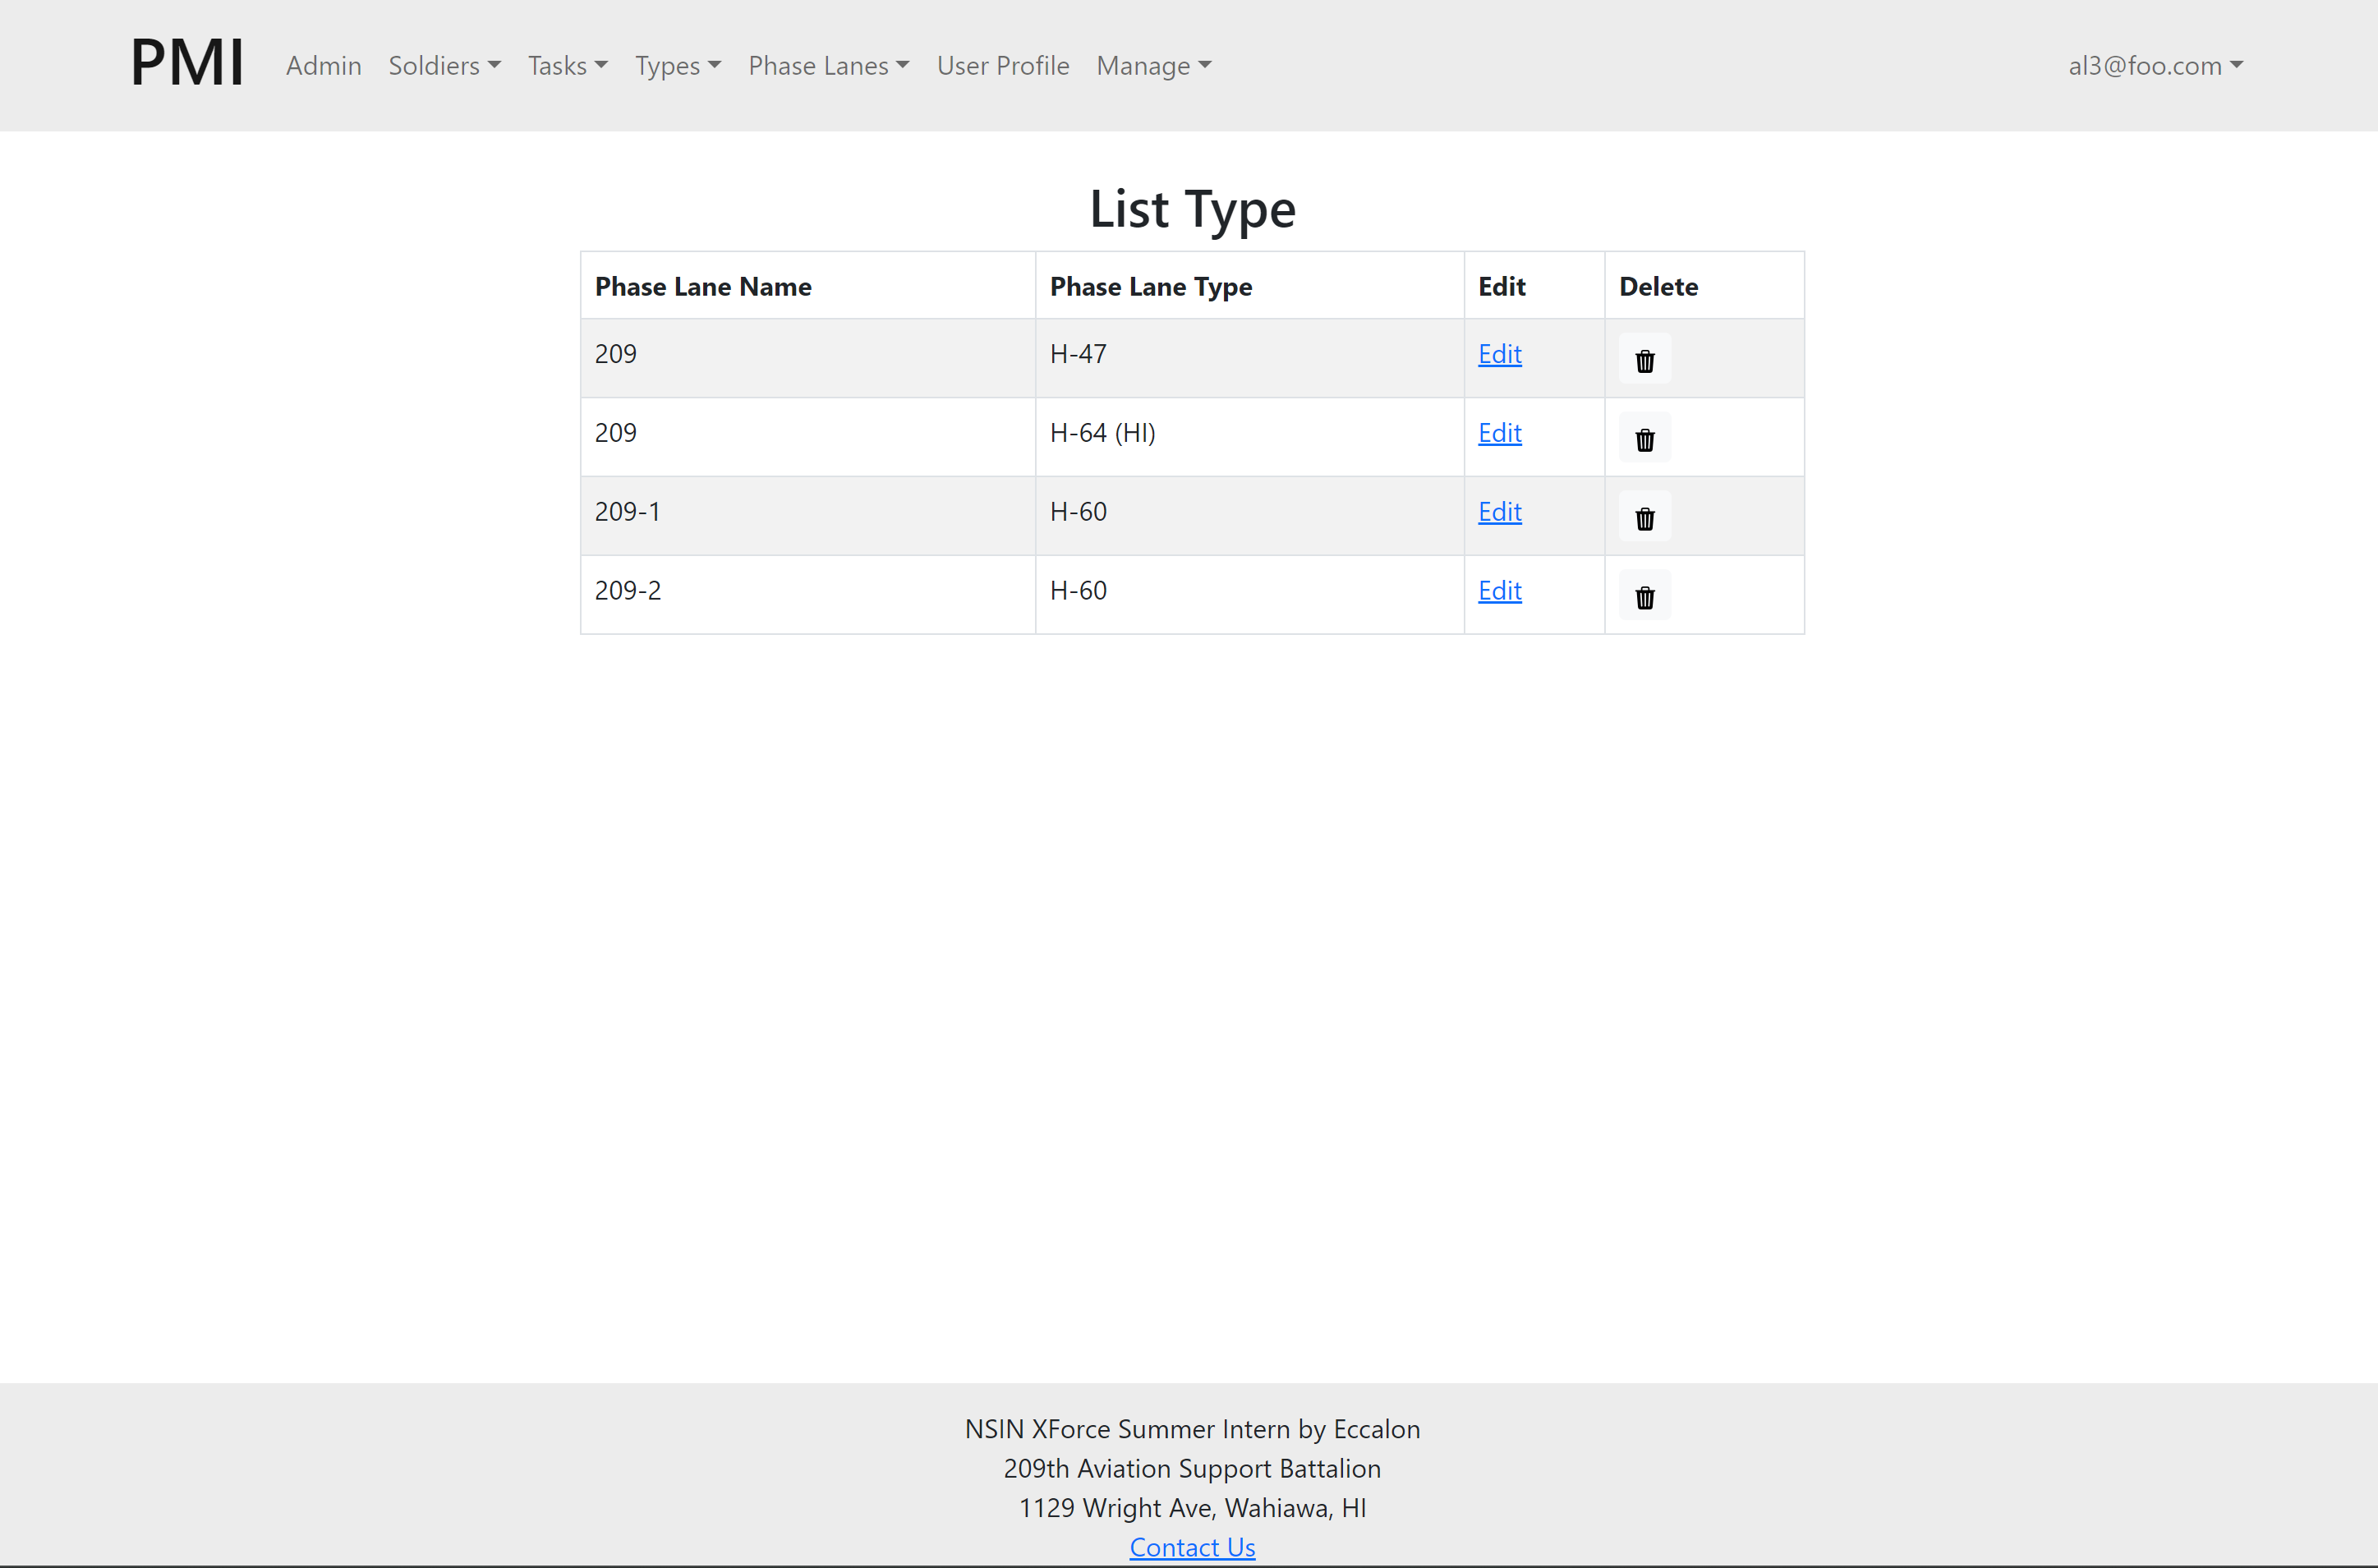
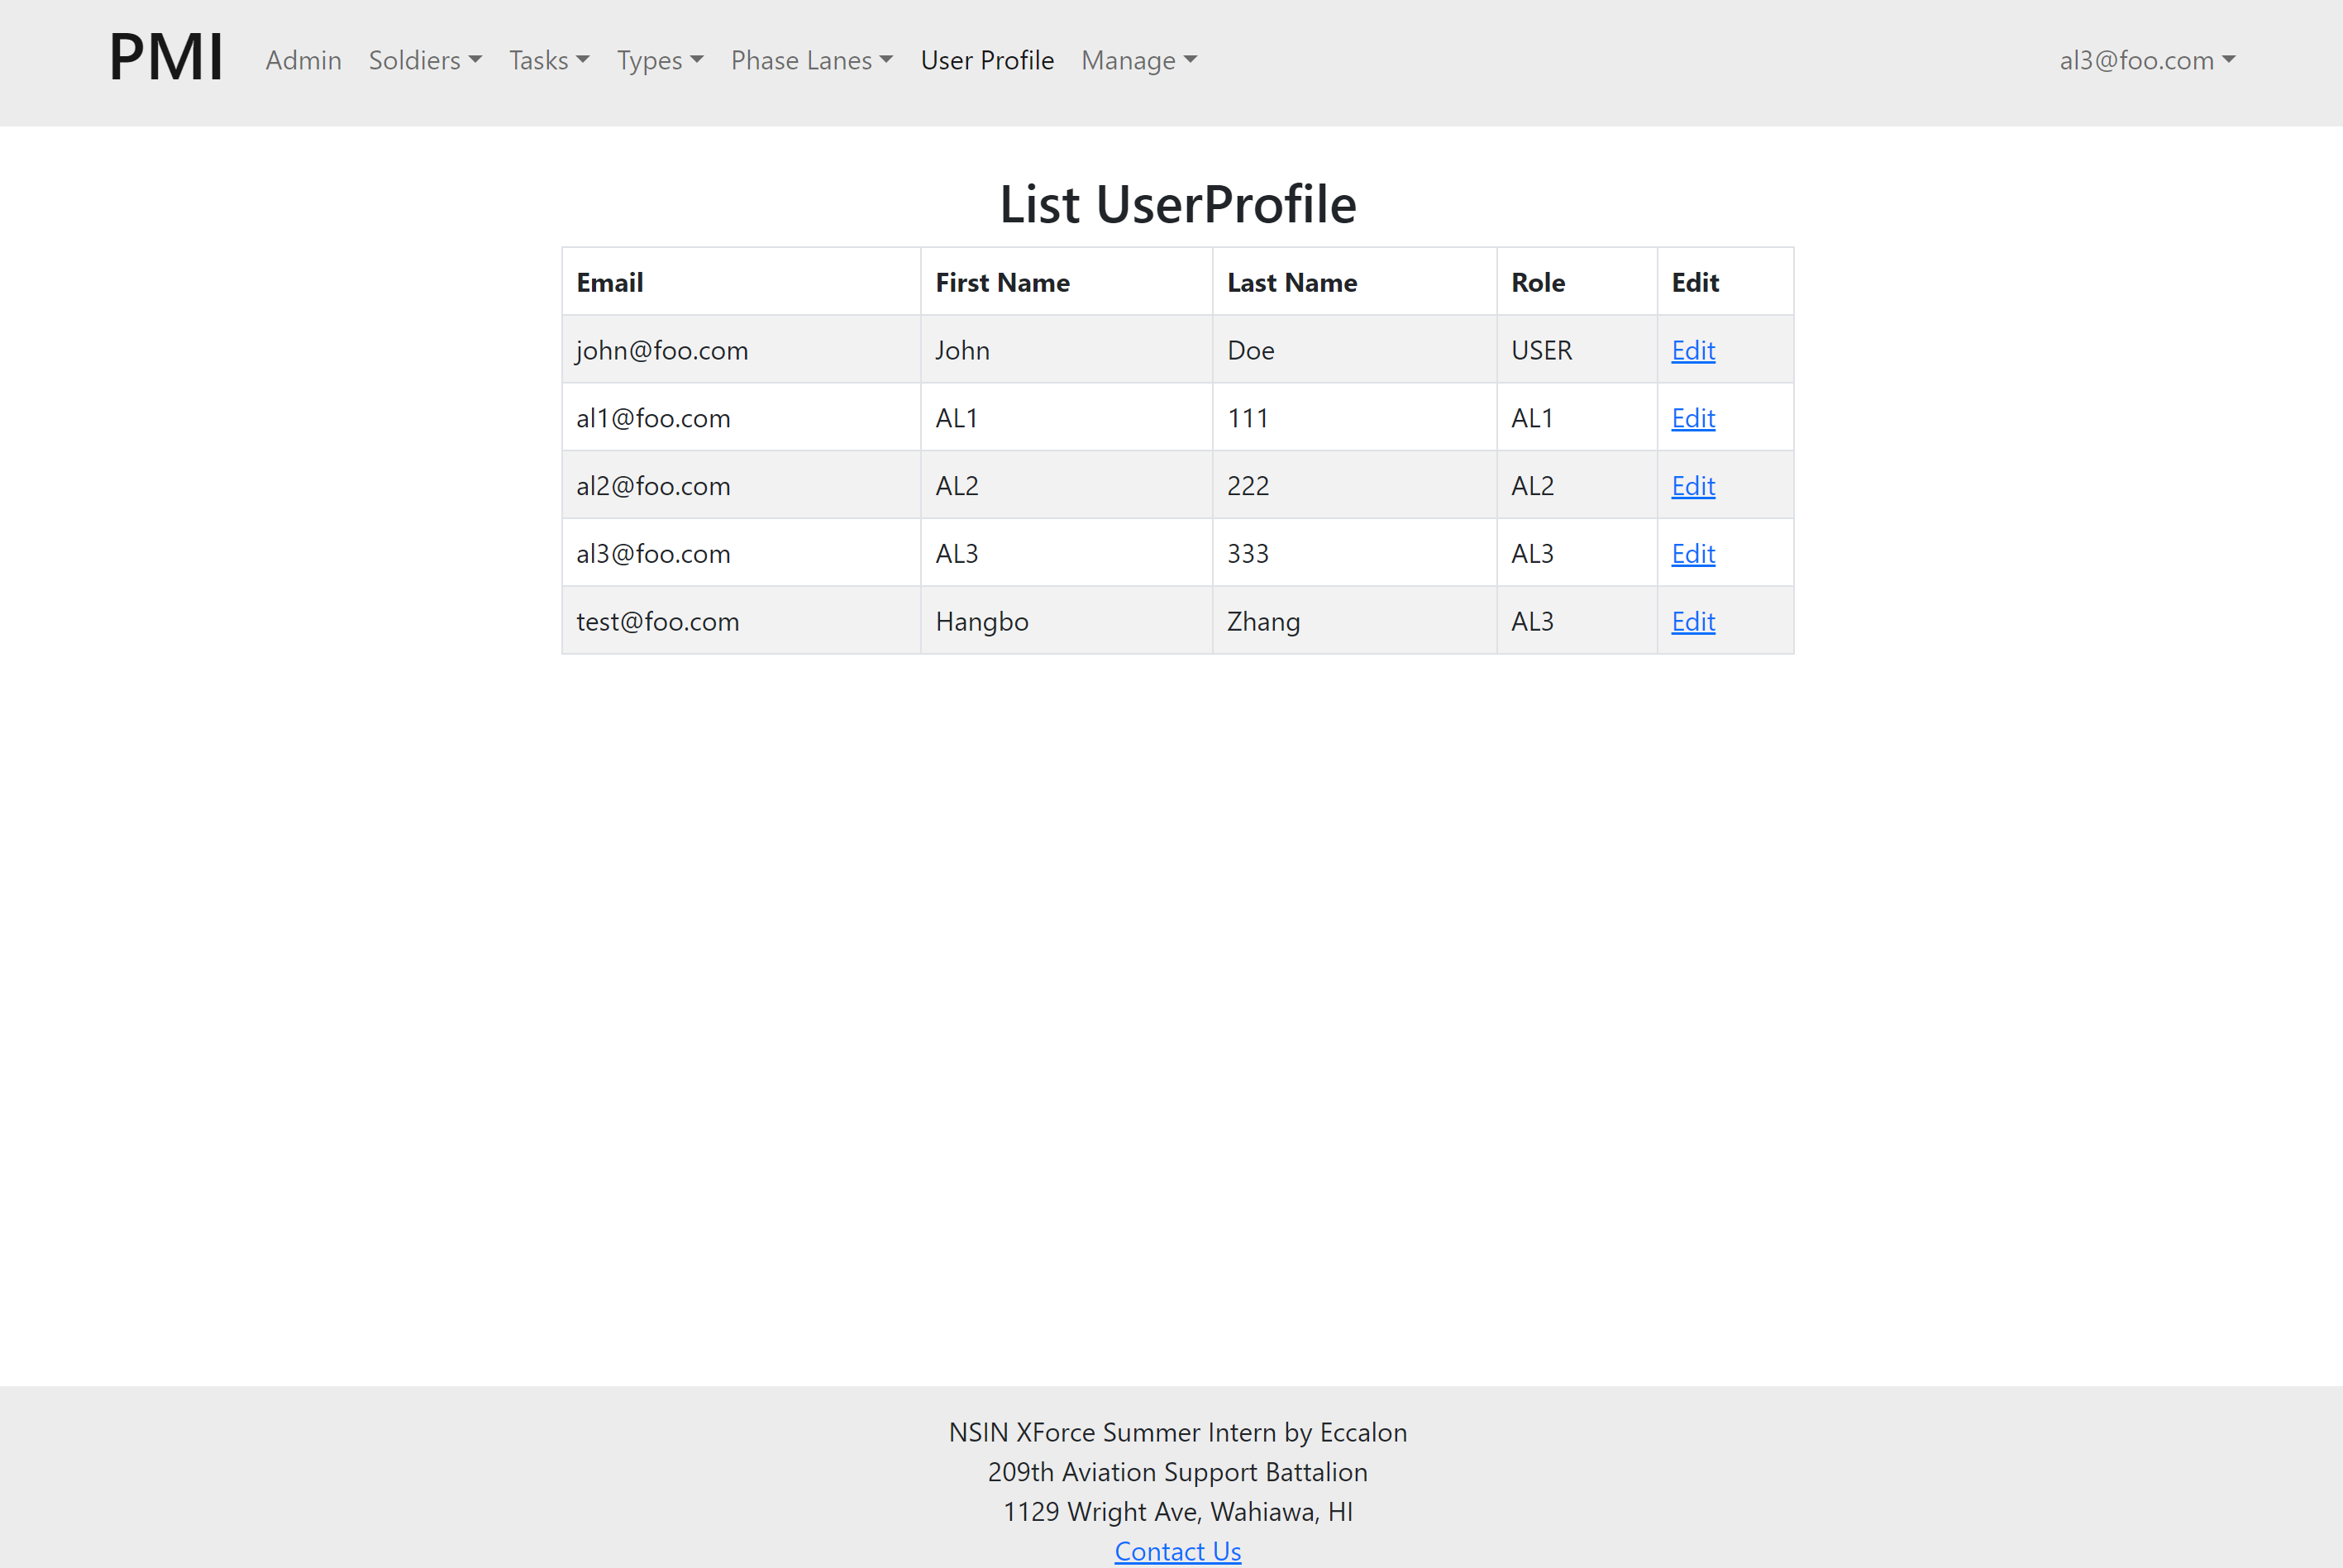
Listing Pages (Only for Admin and AL3)
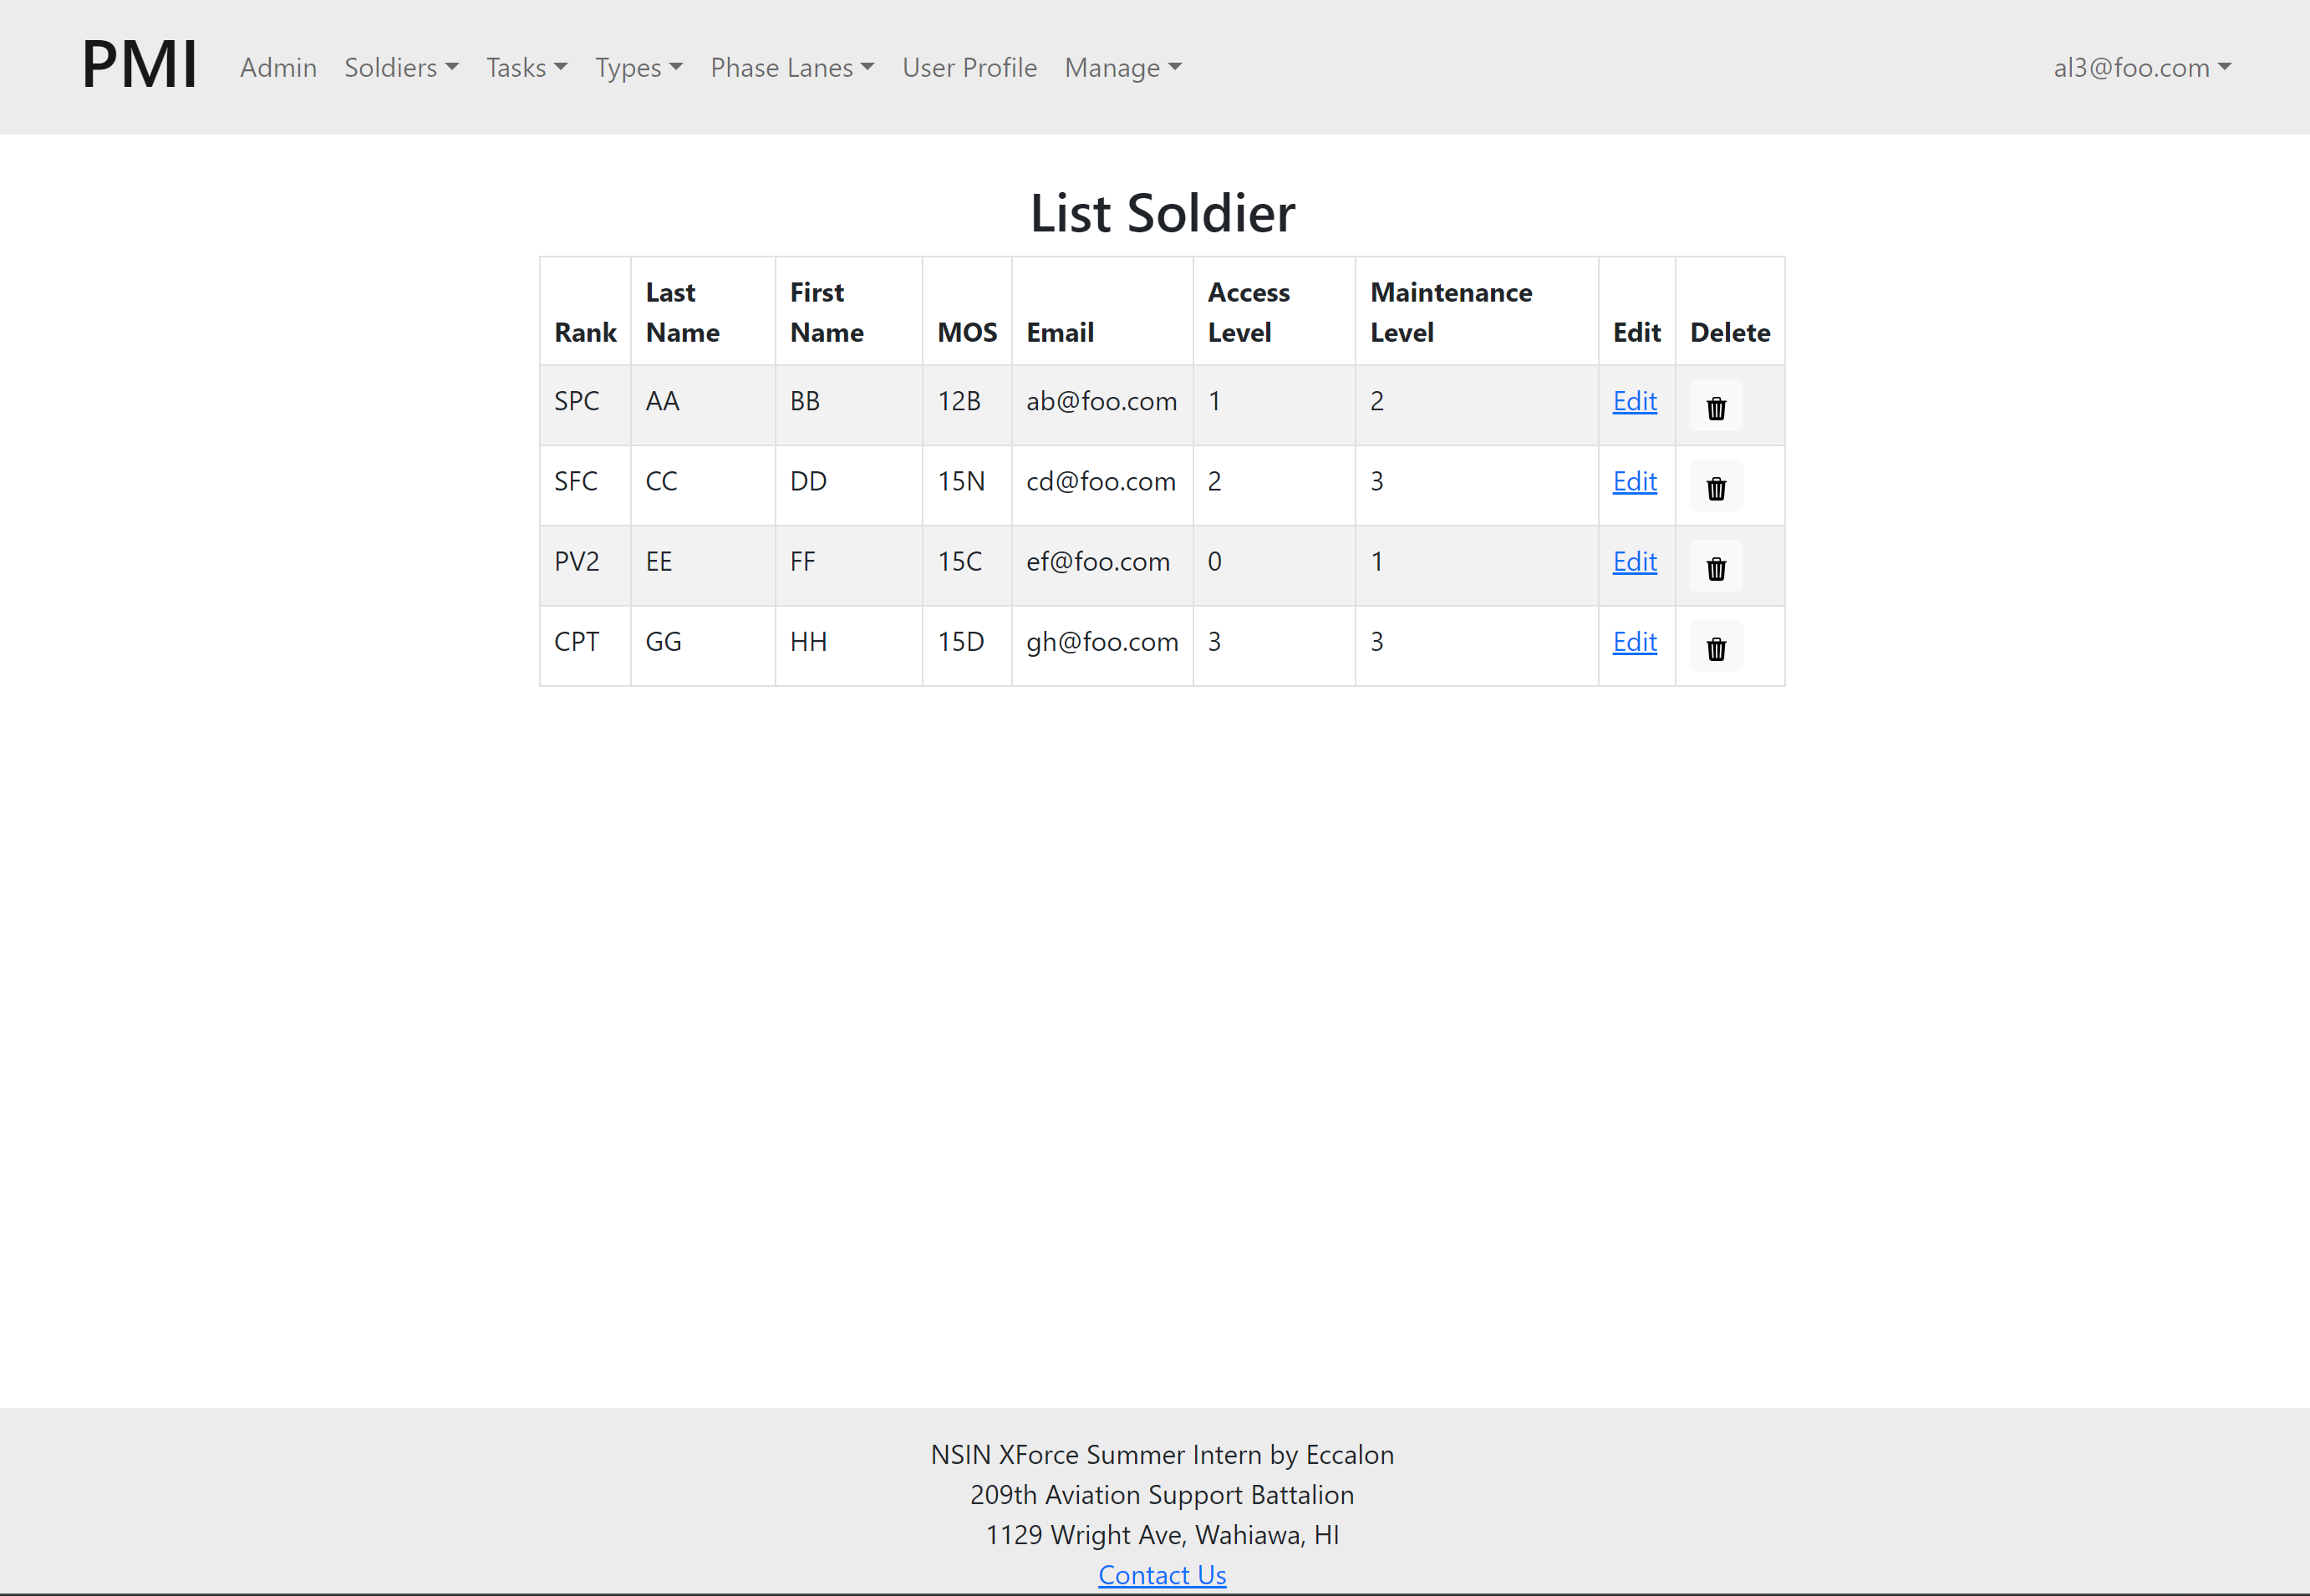
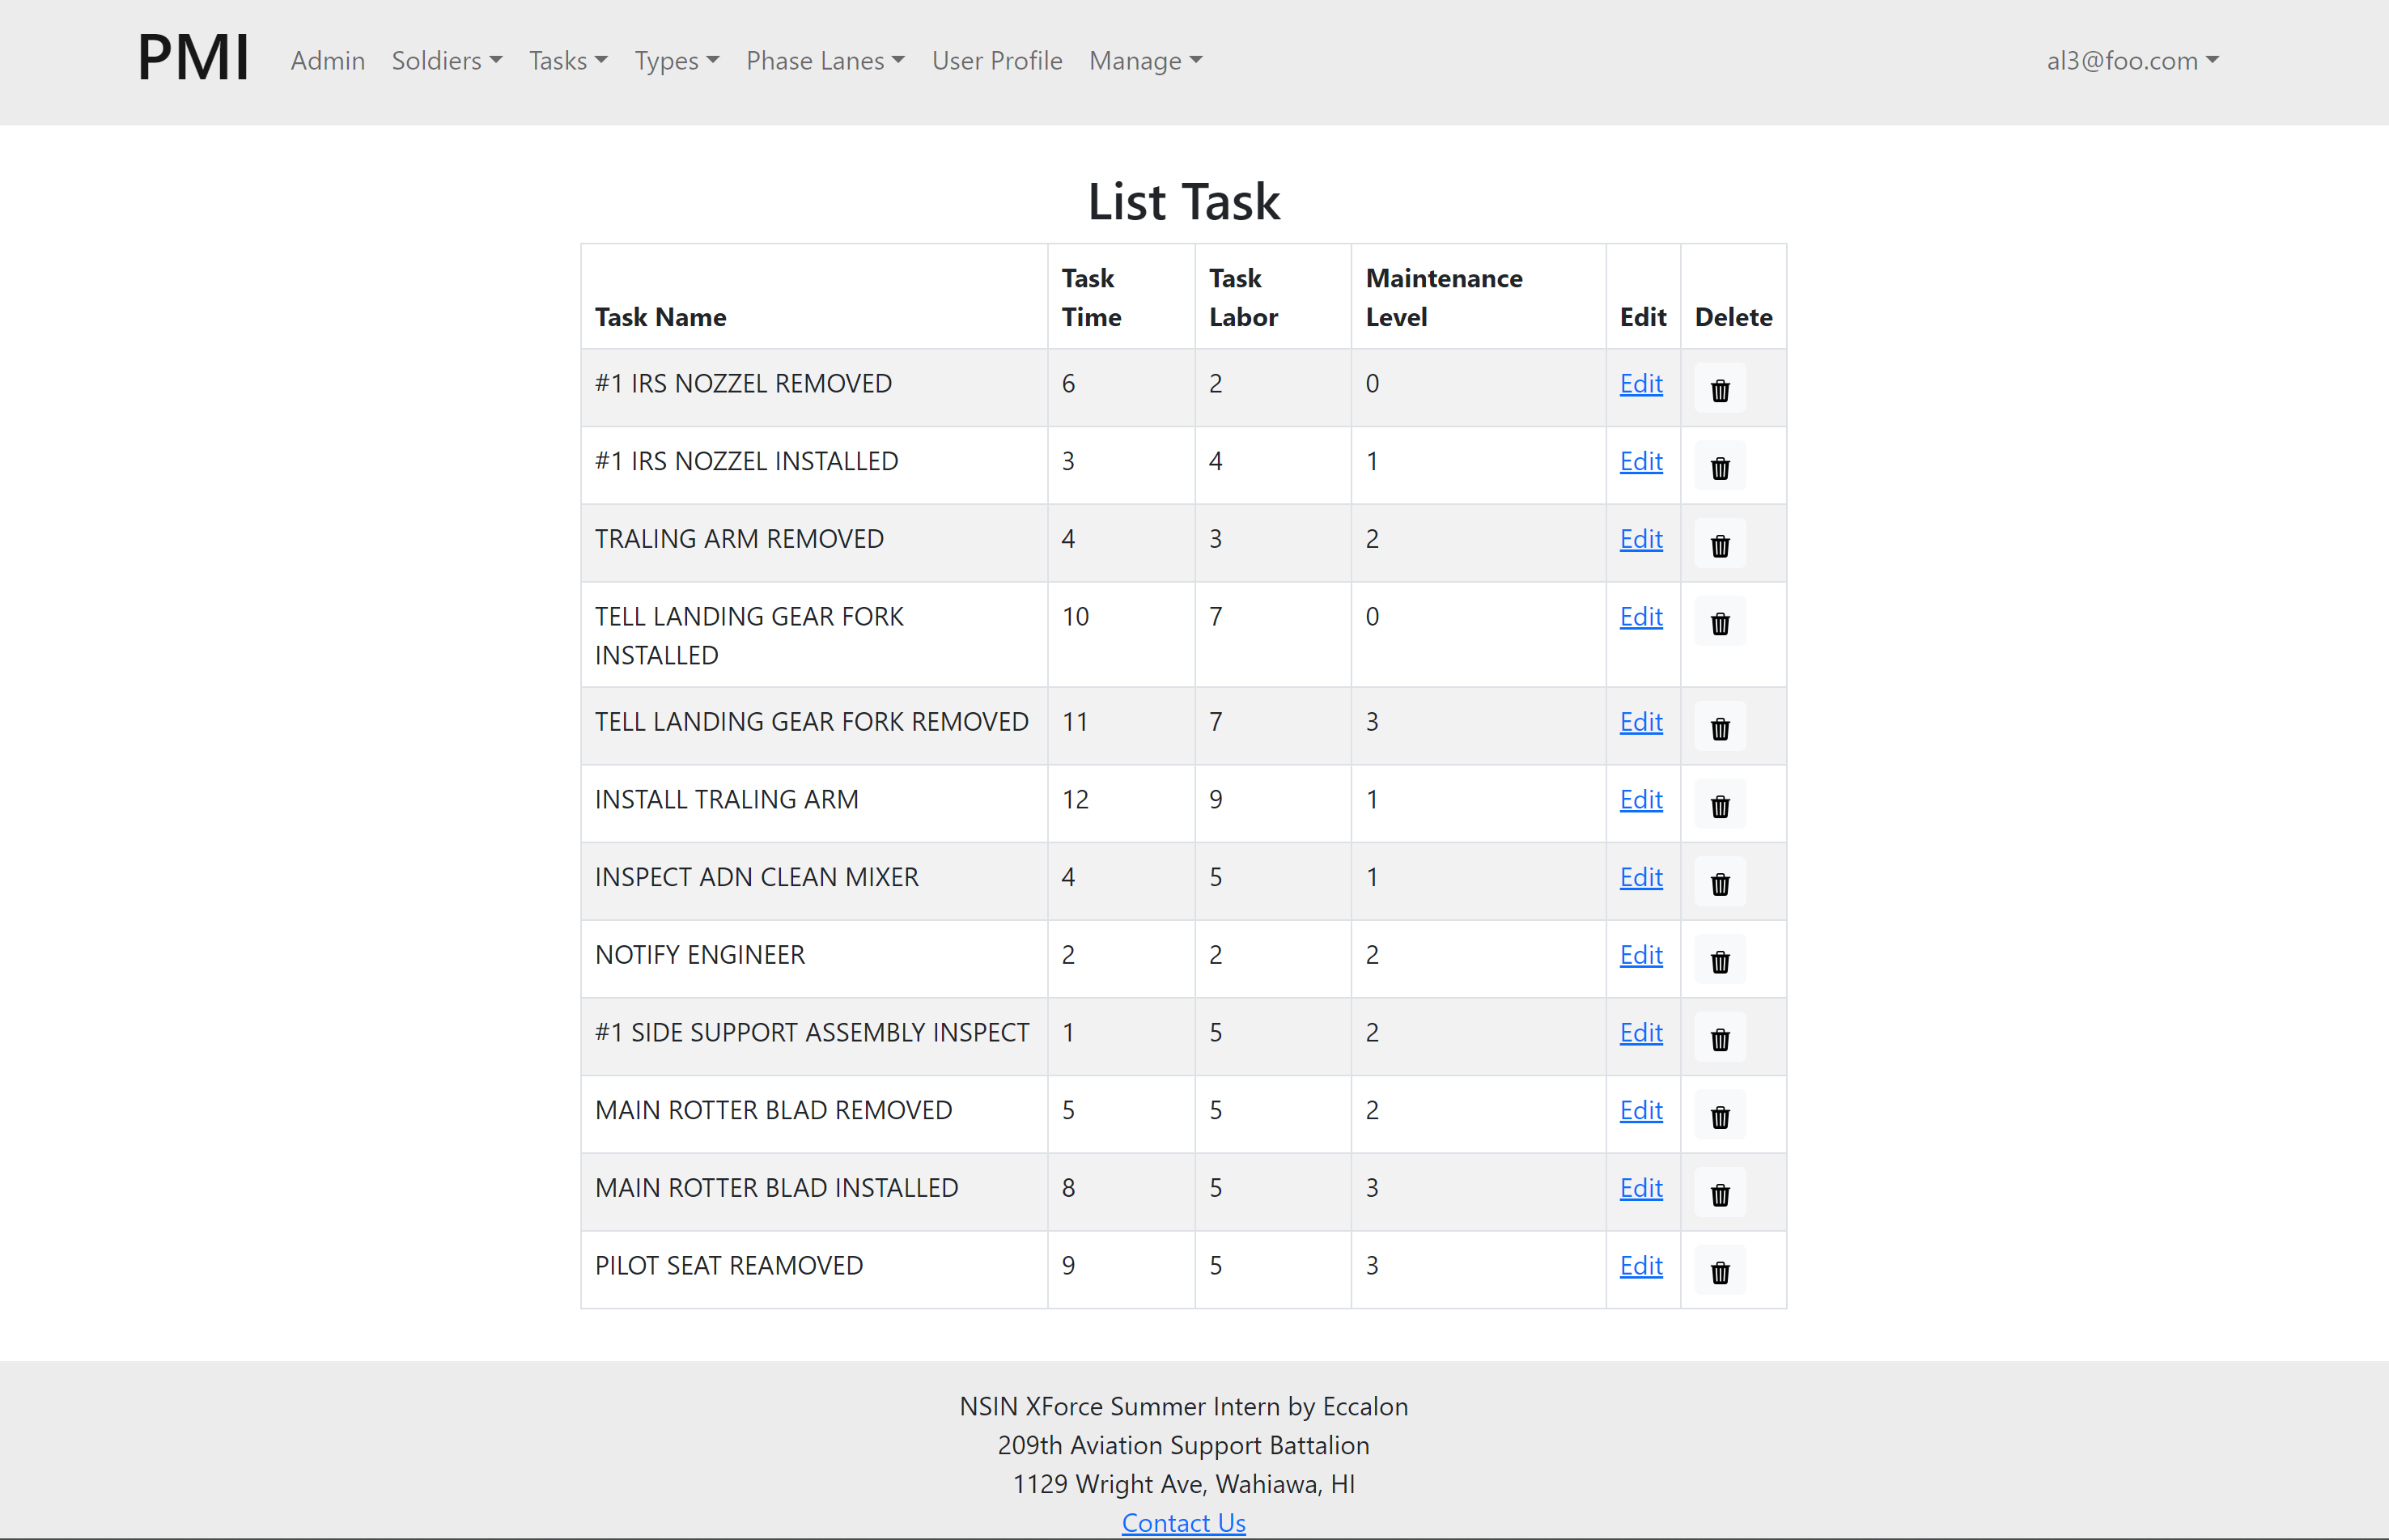
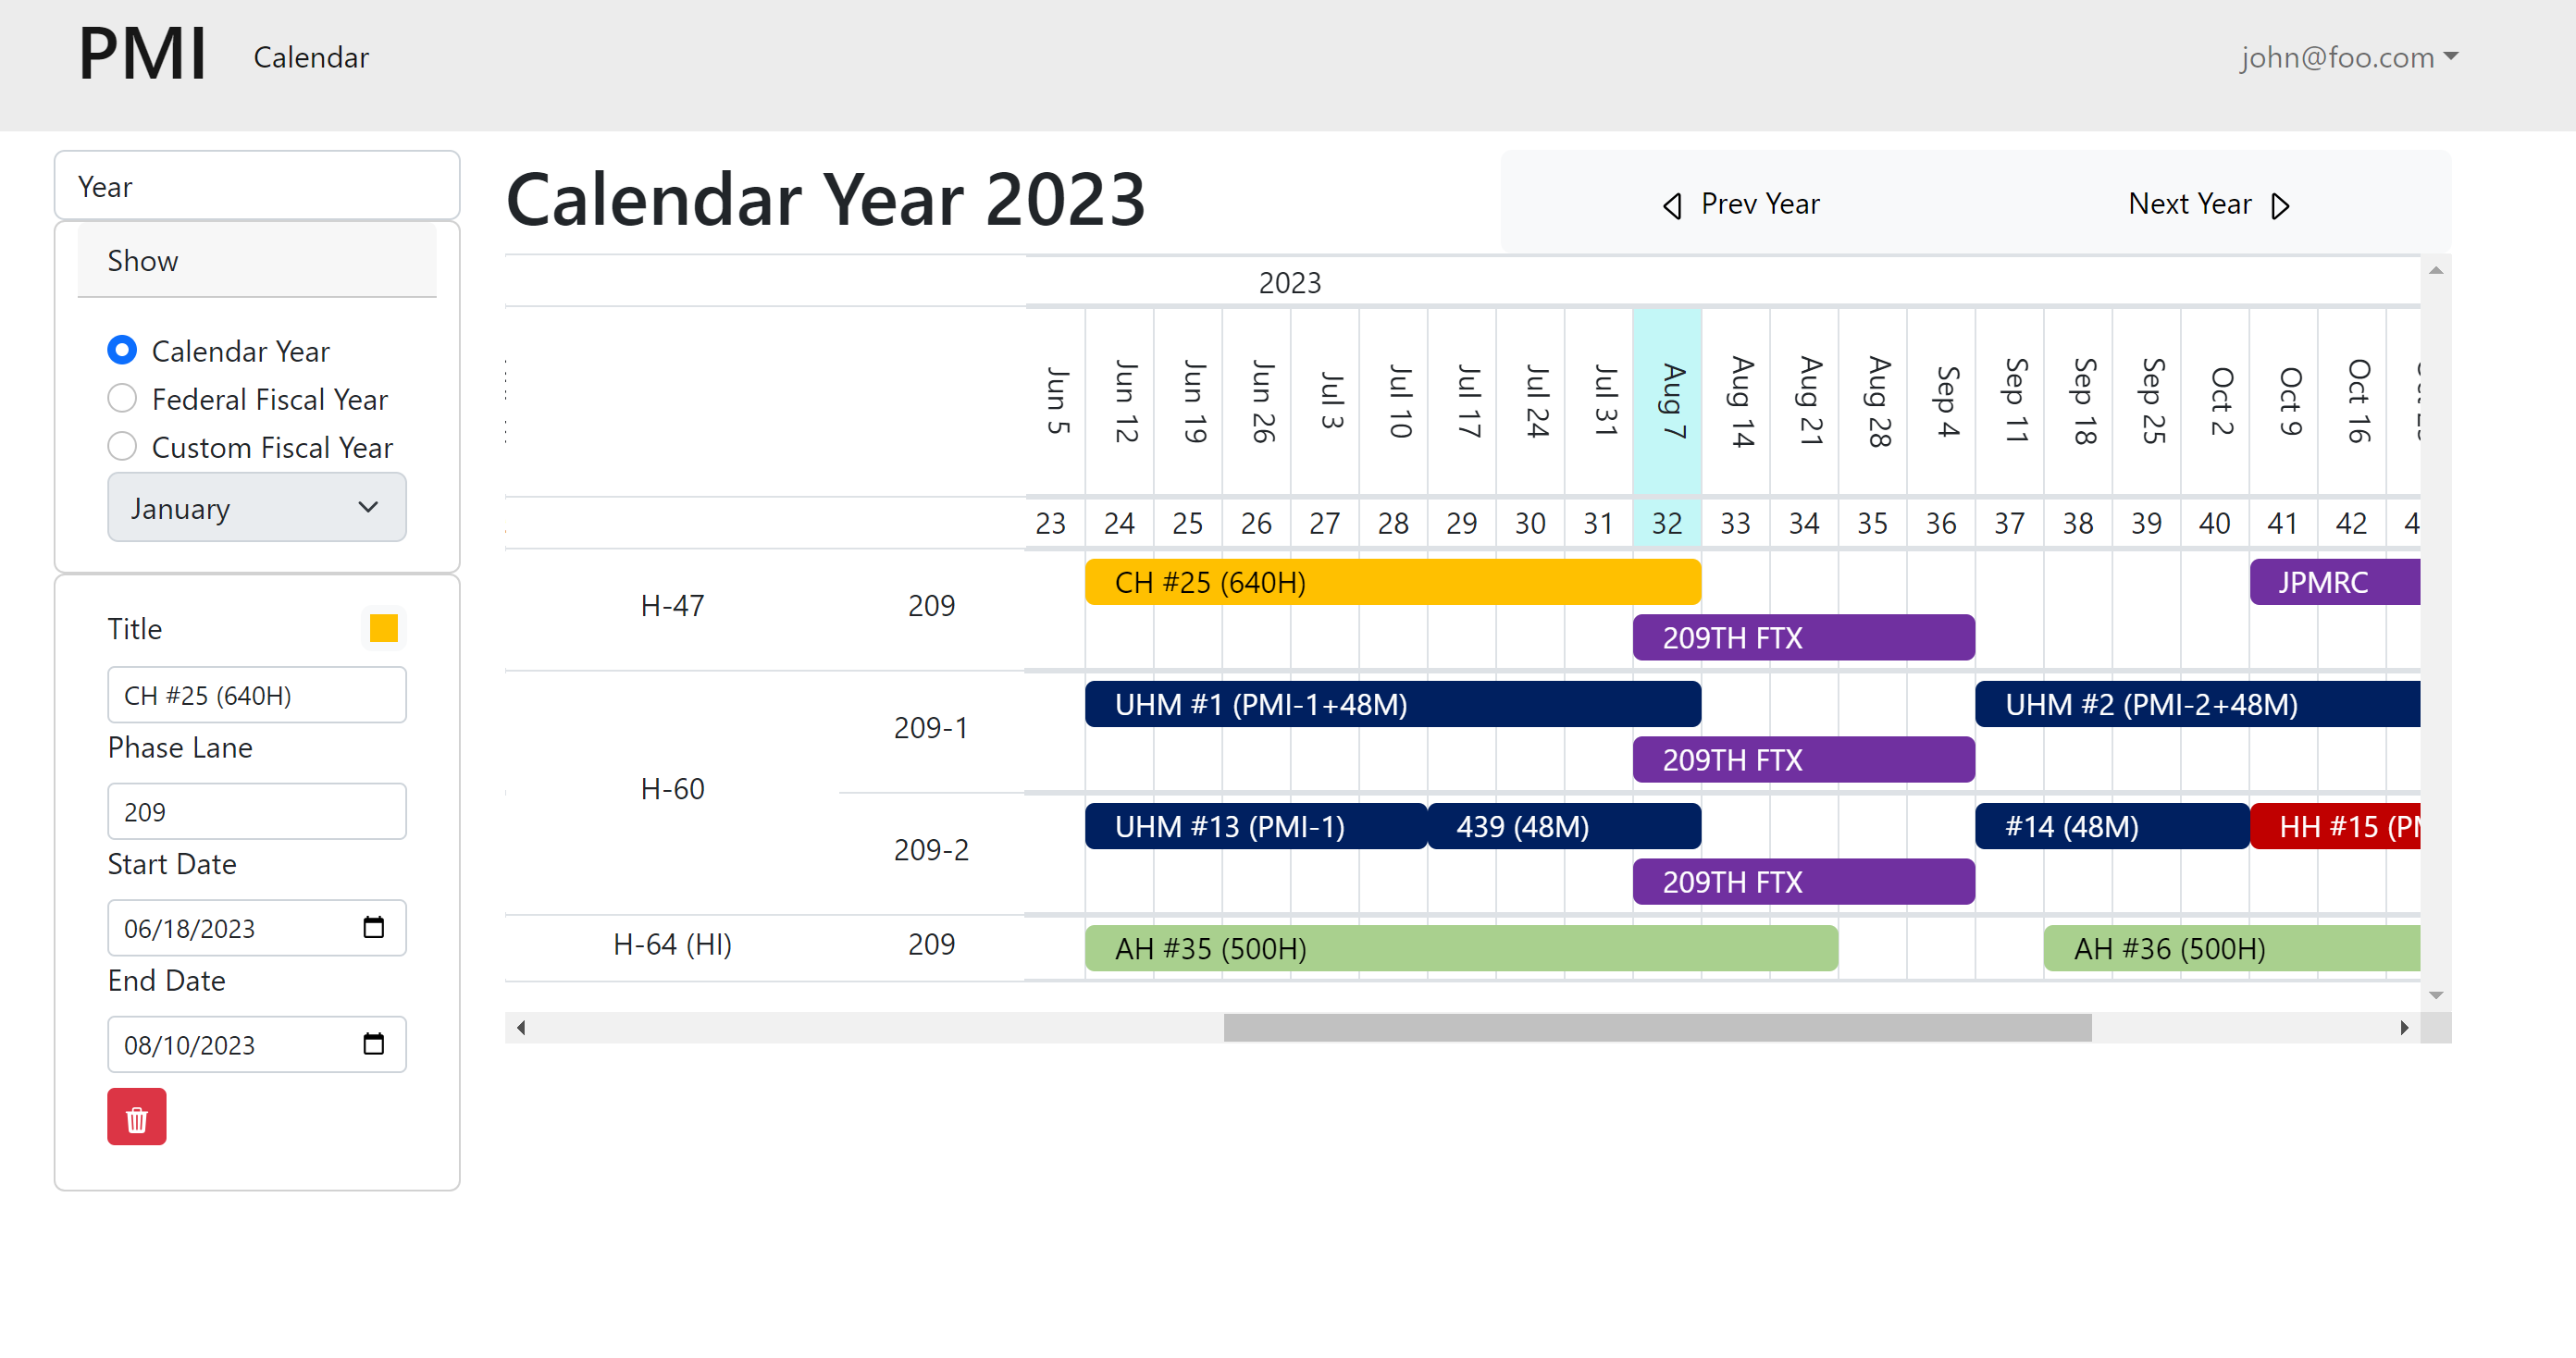
Yearly View
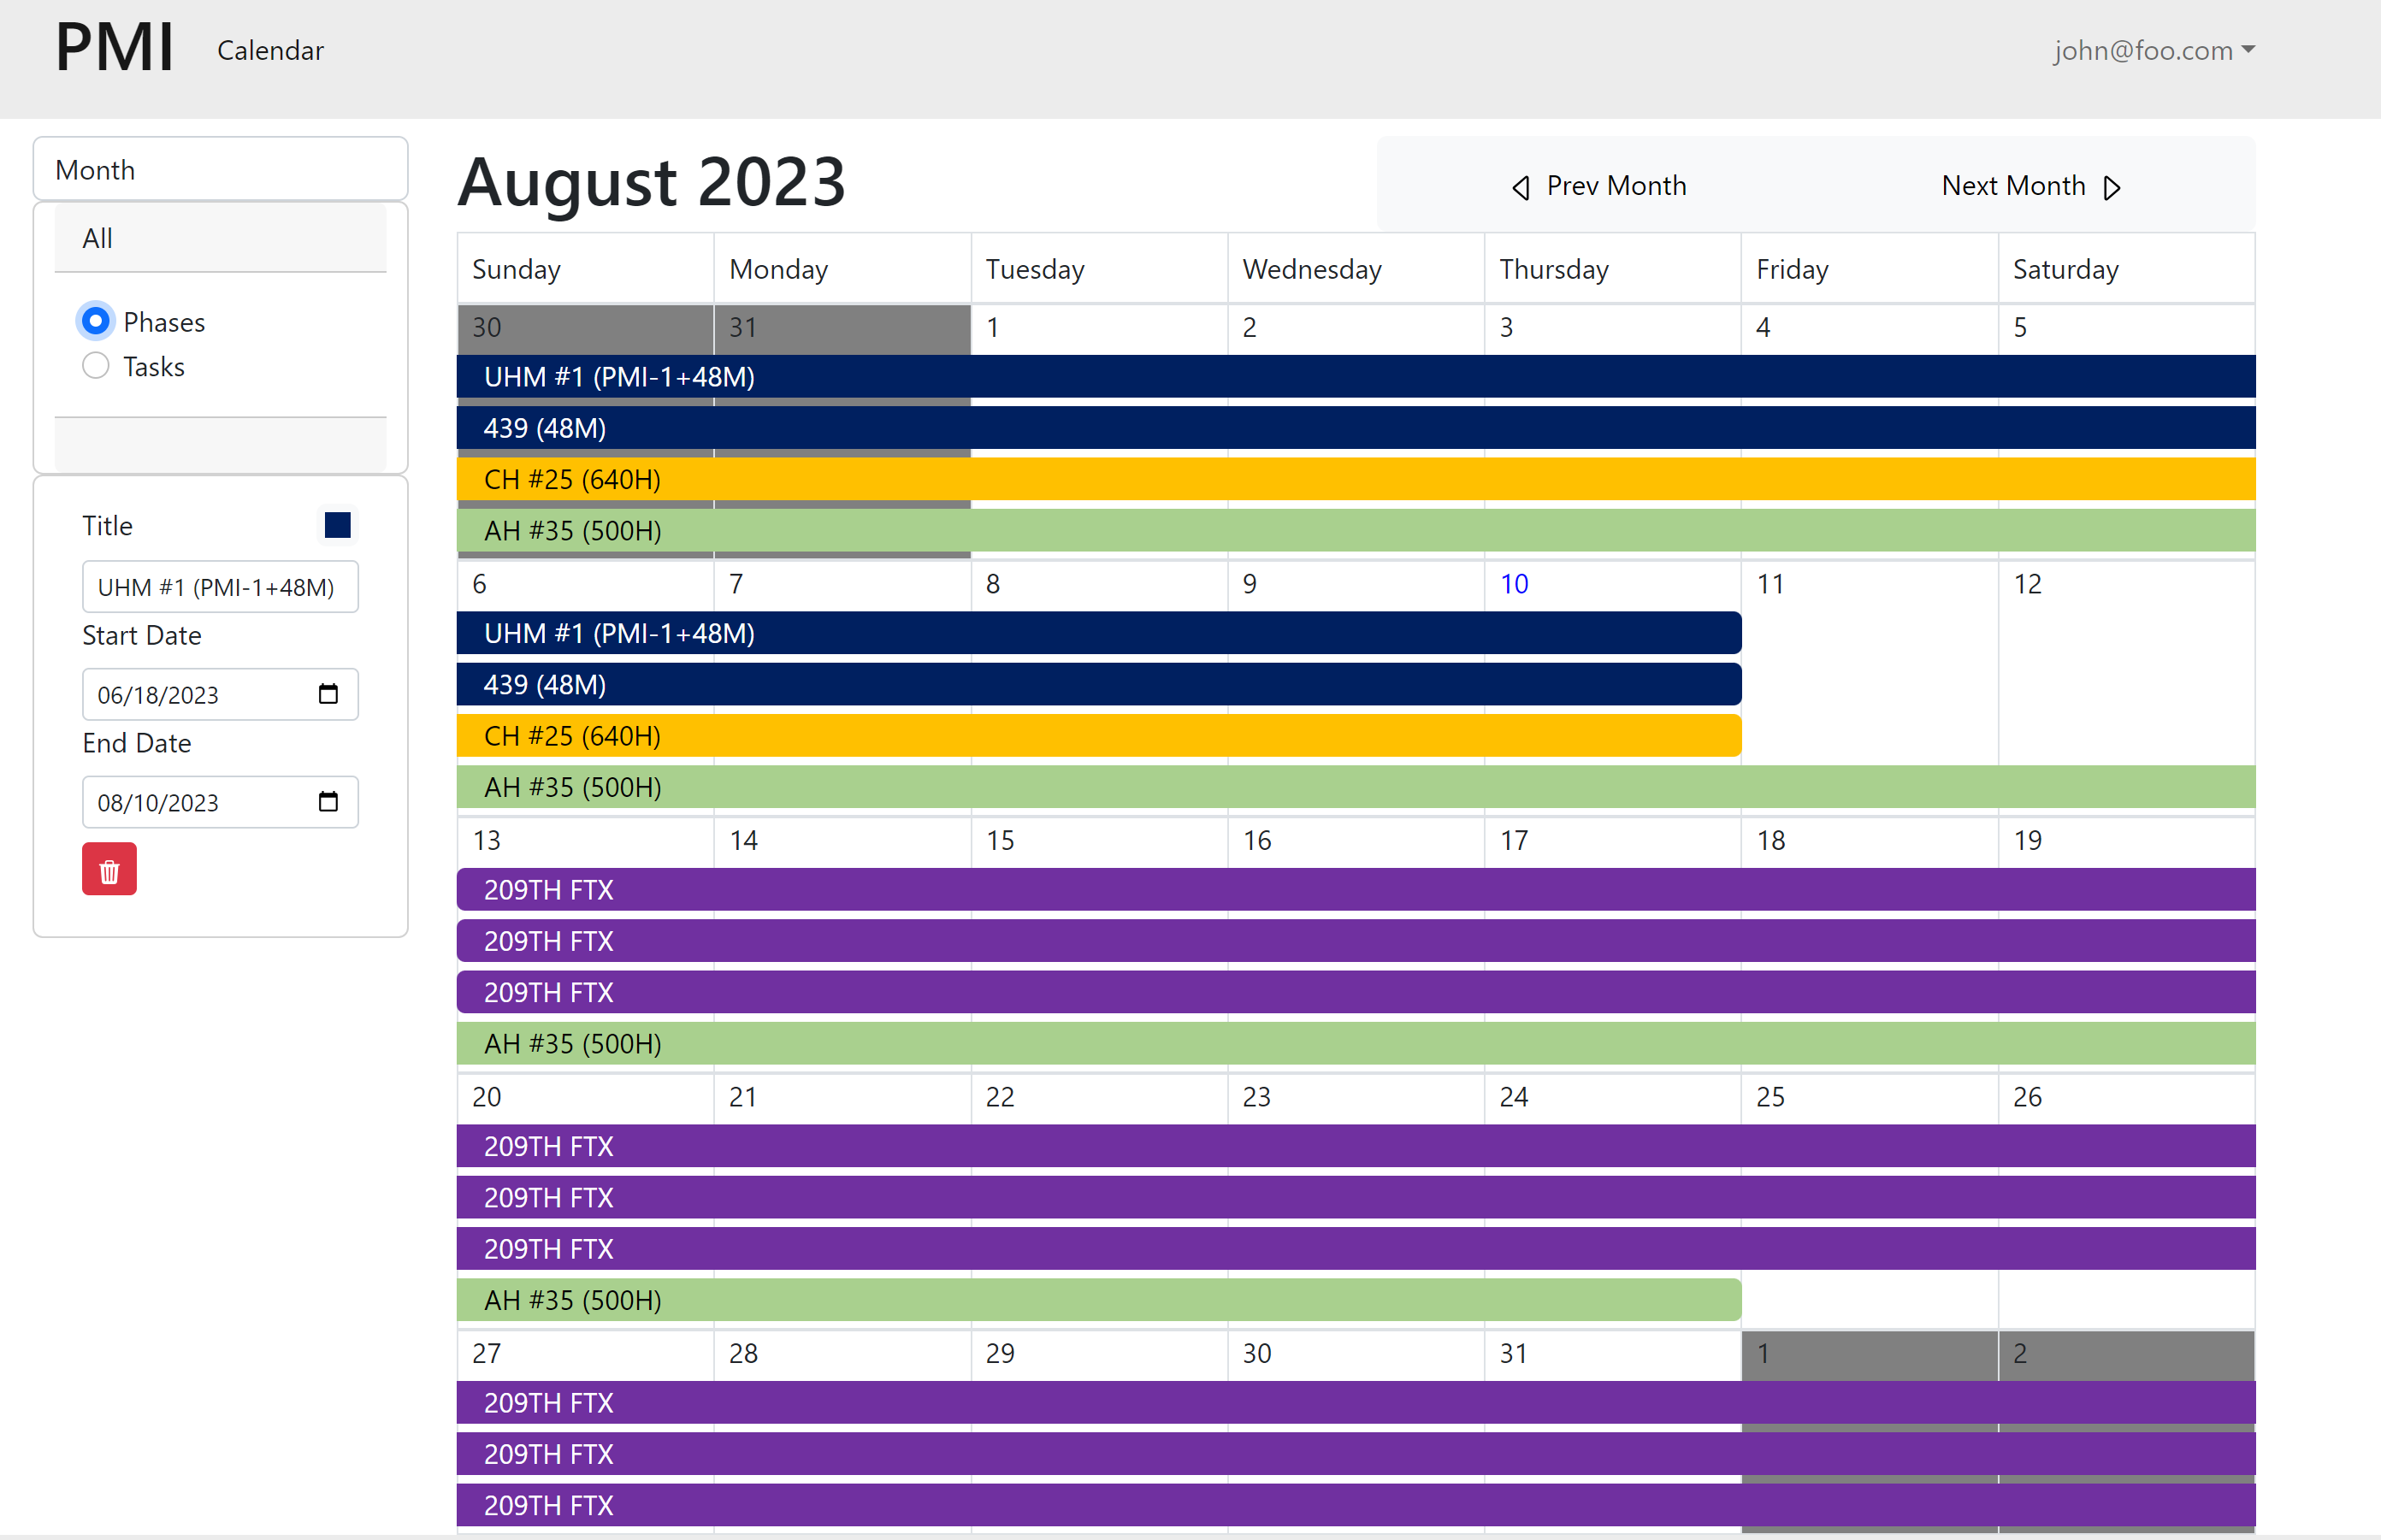
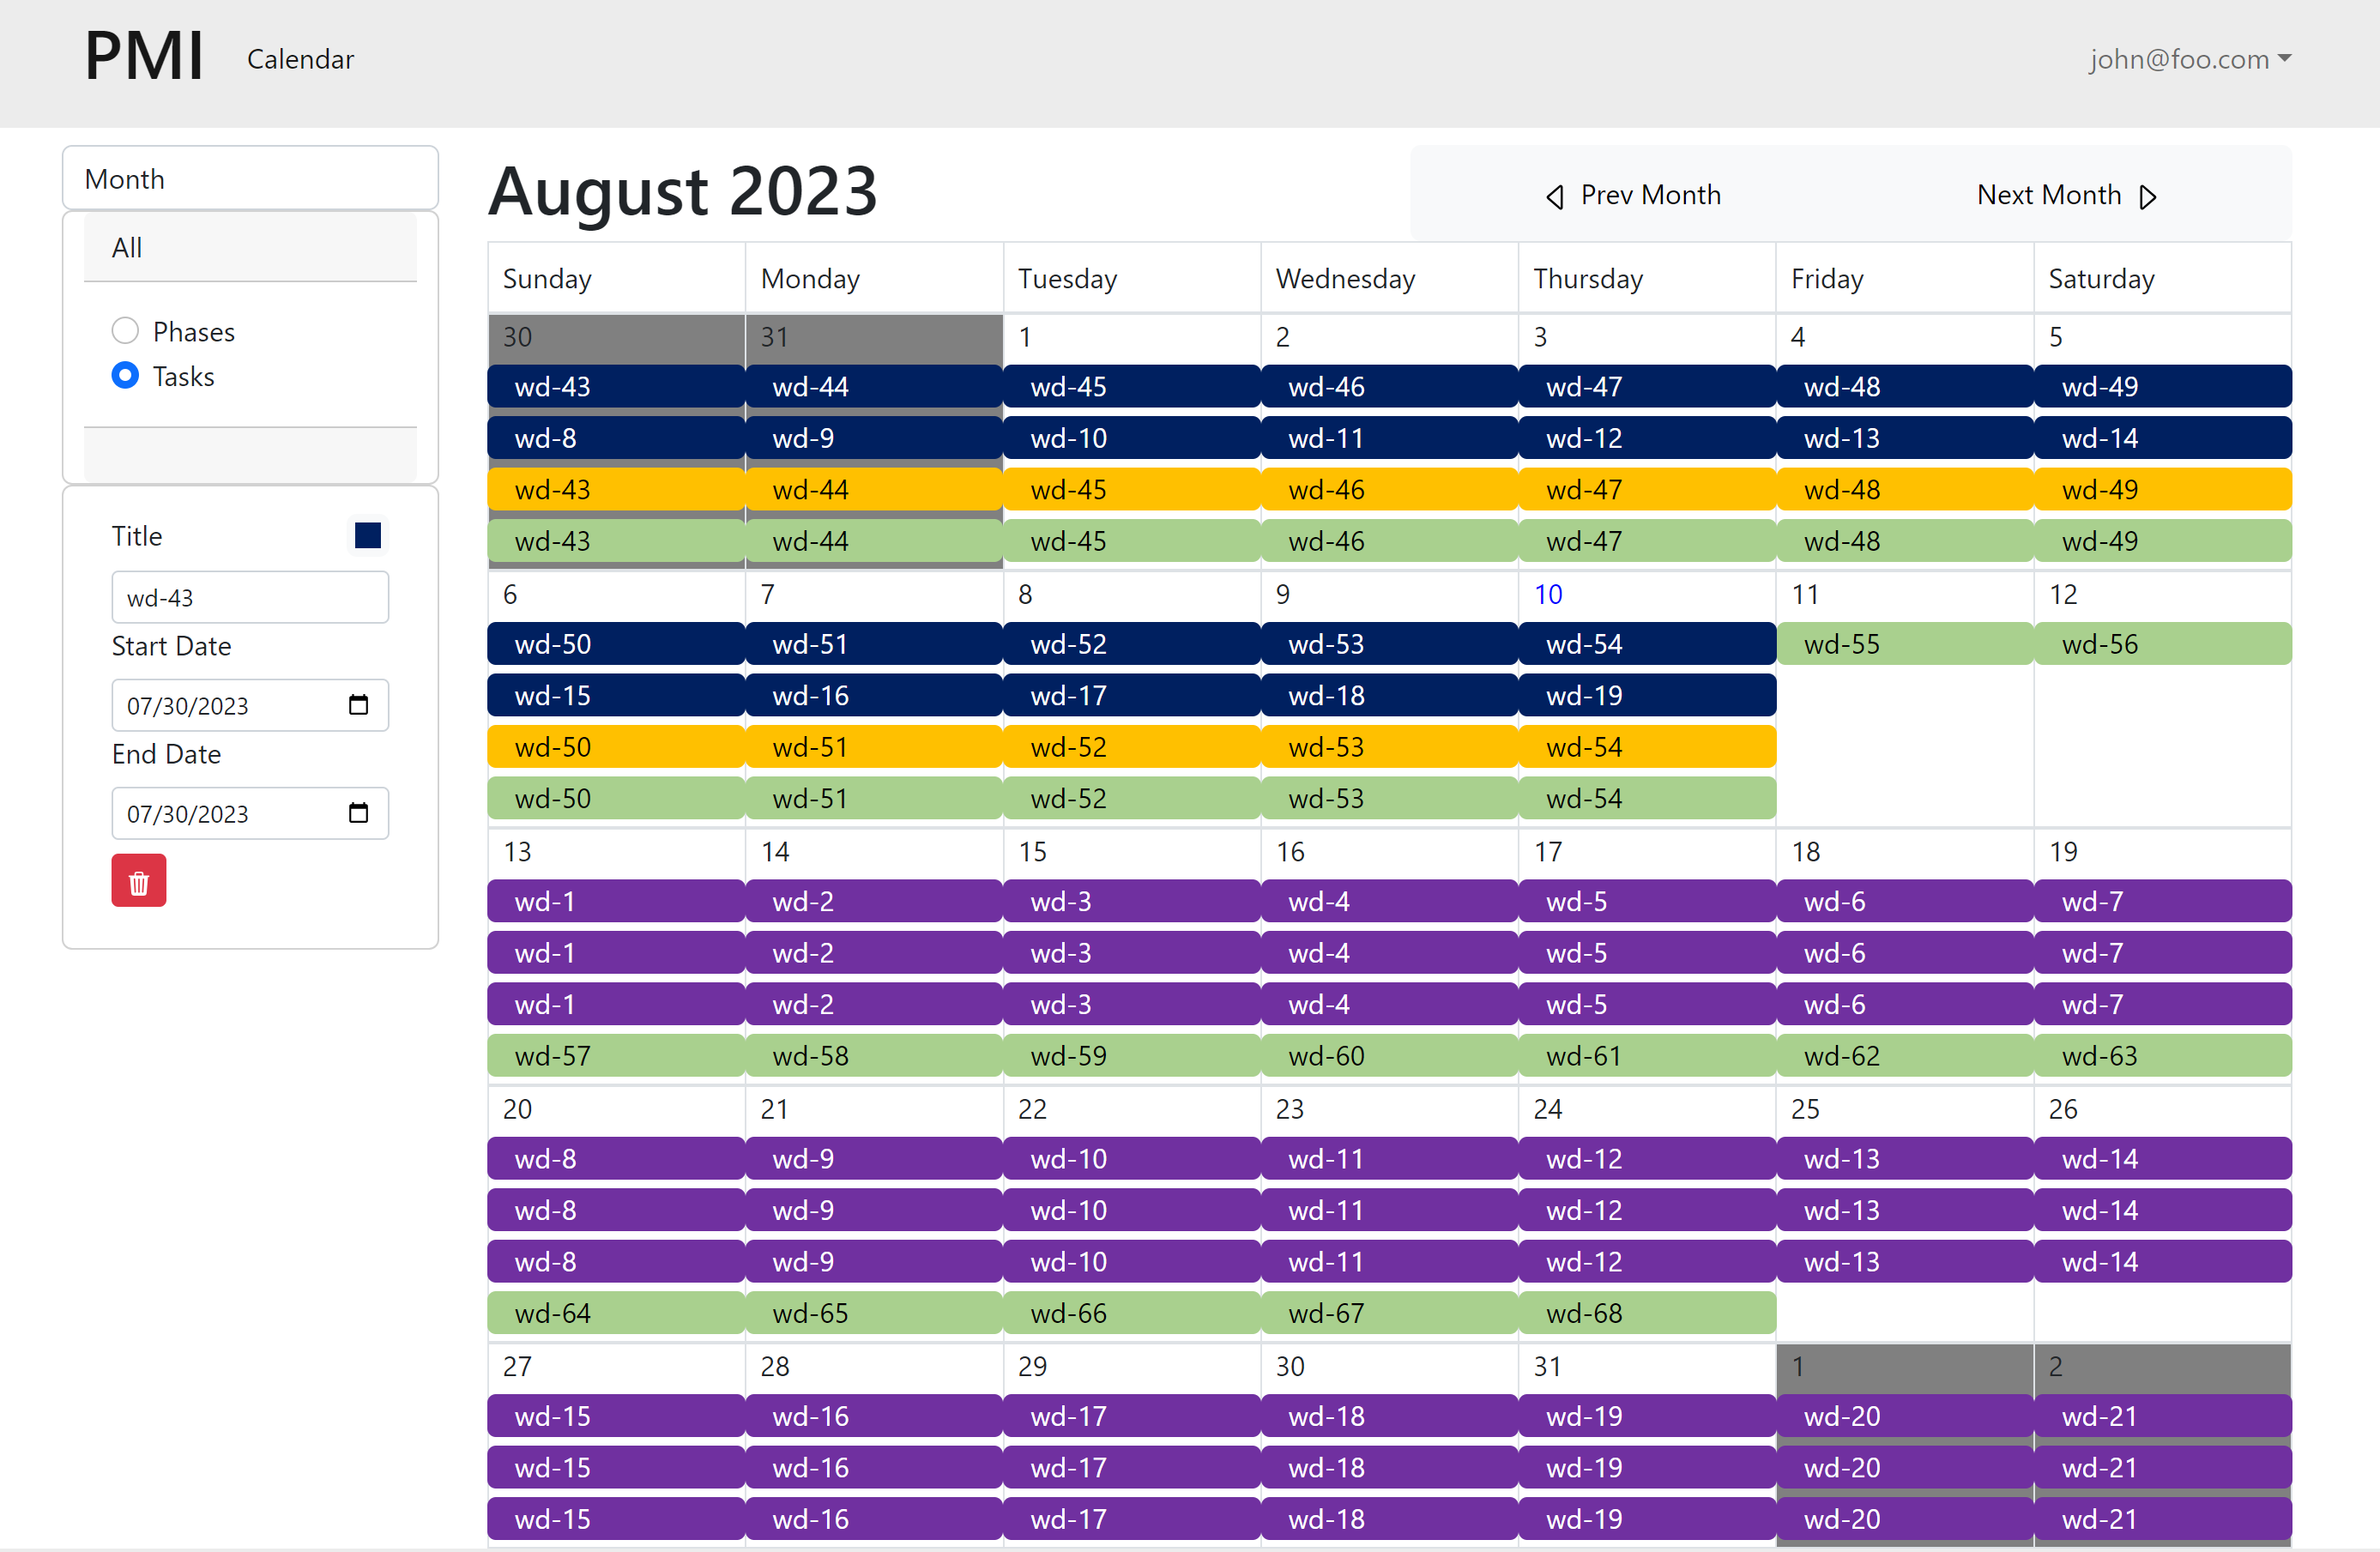
Monthly View
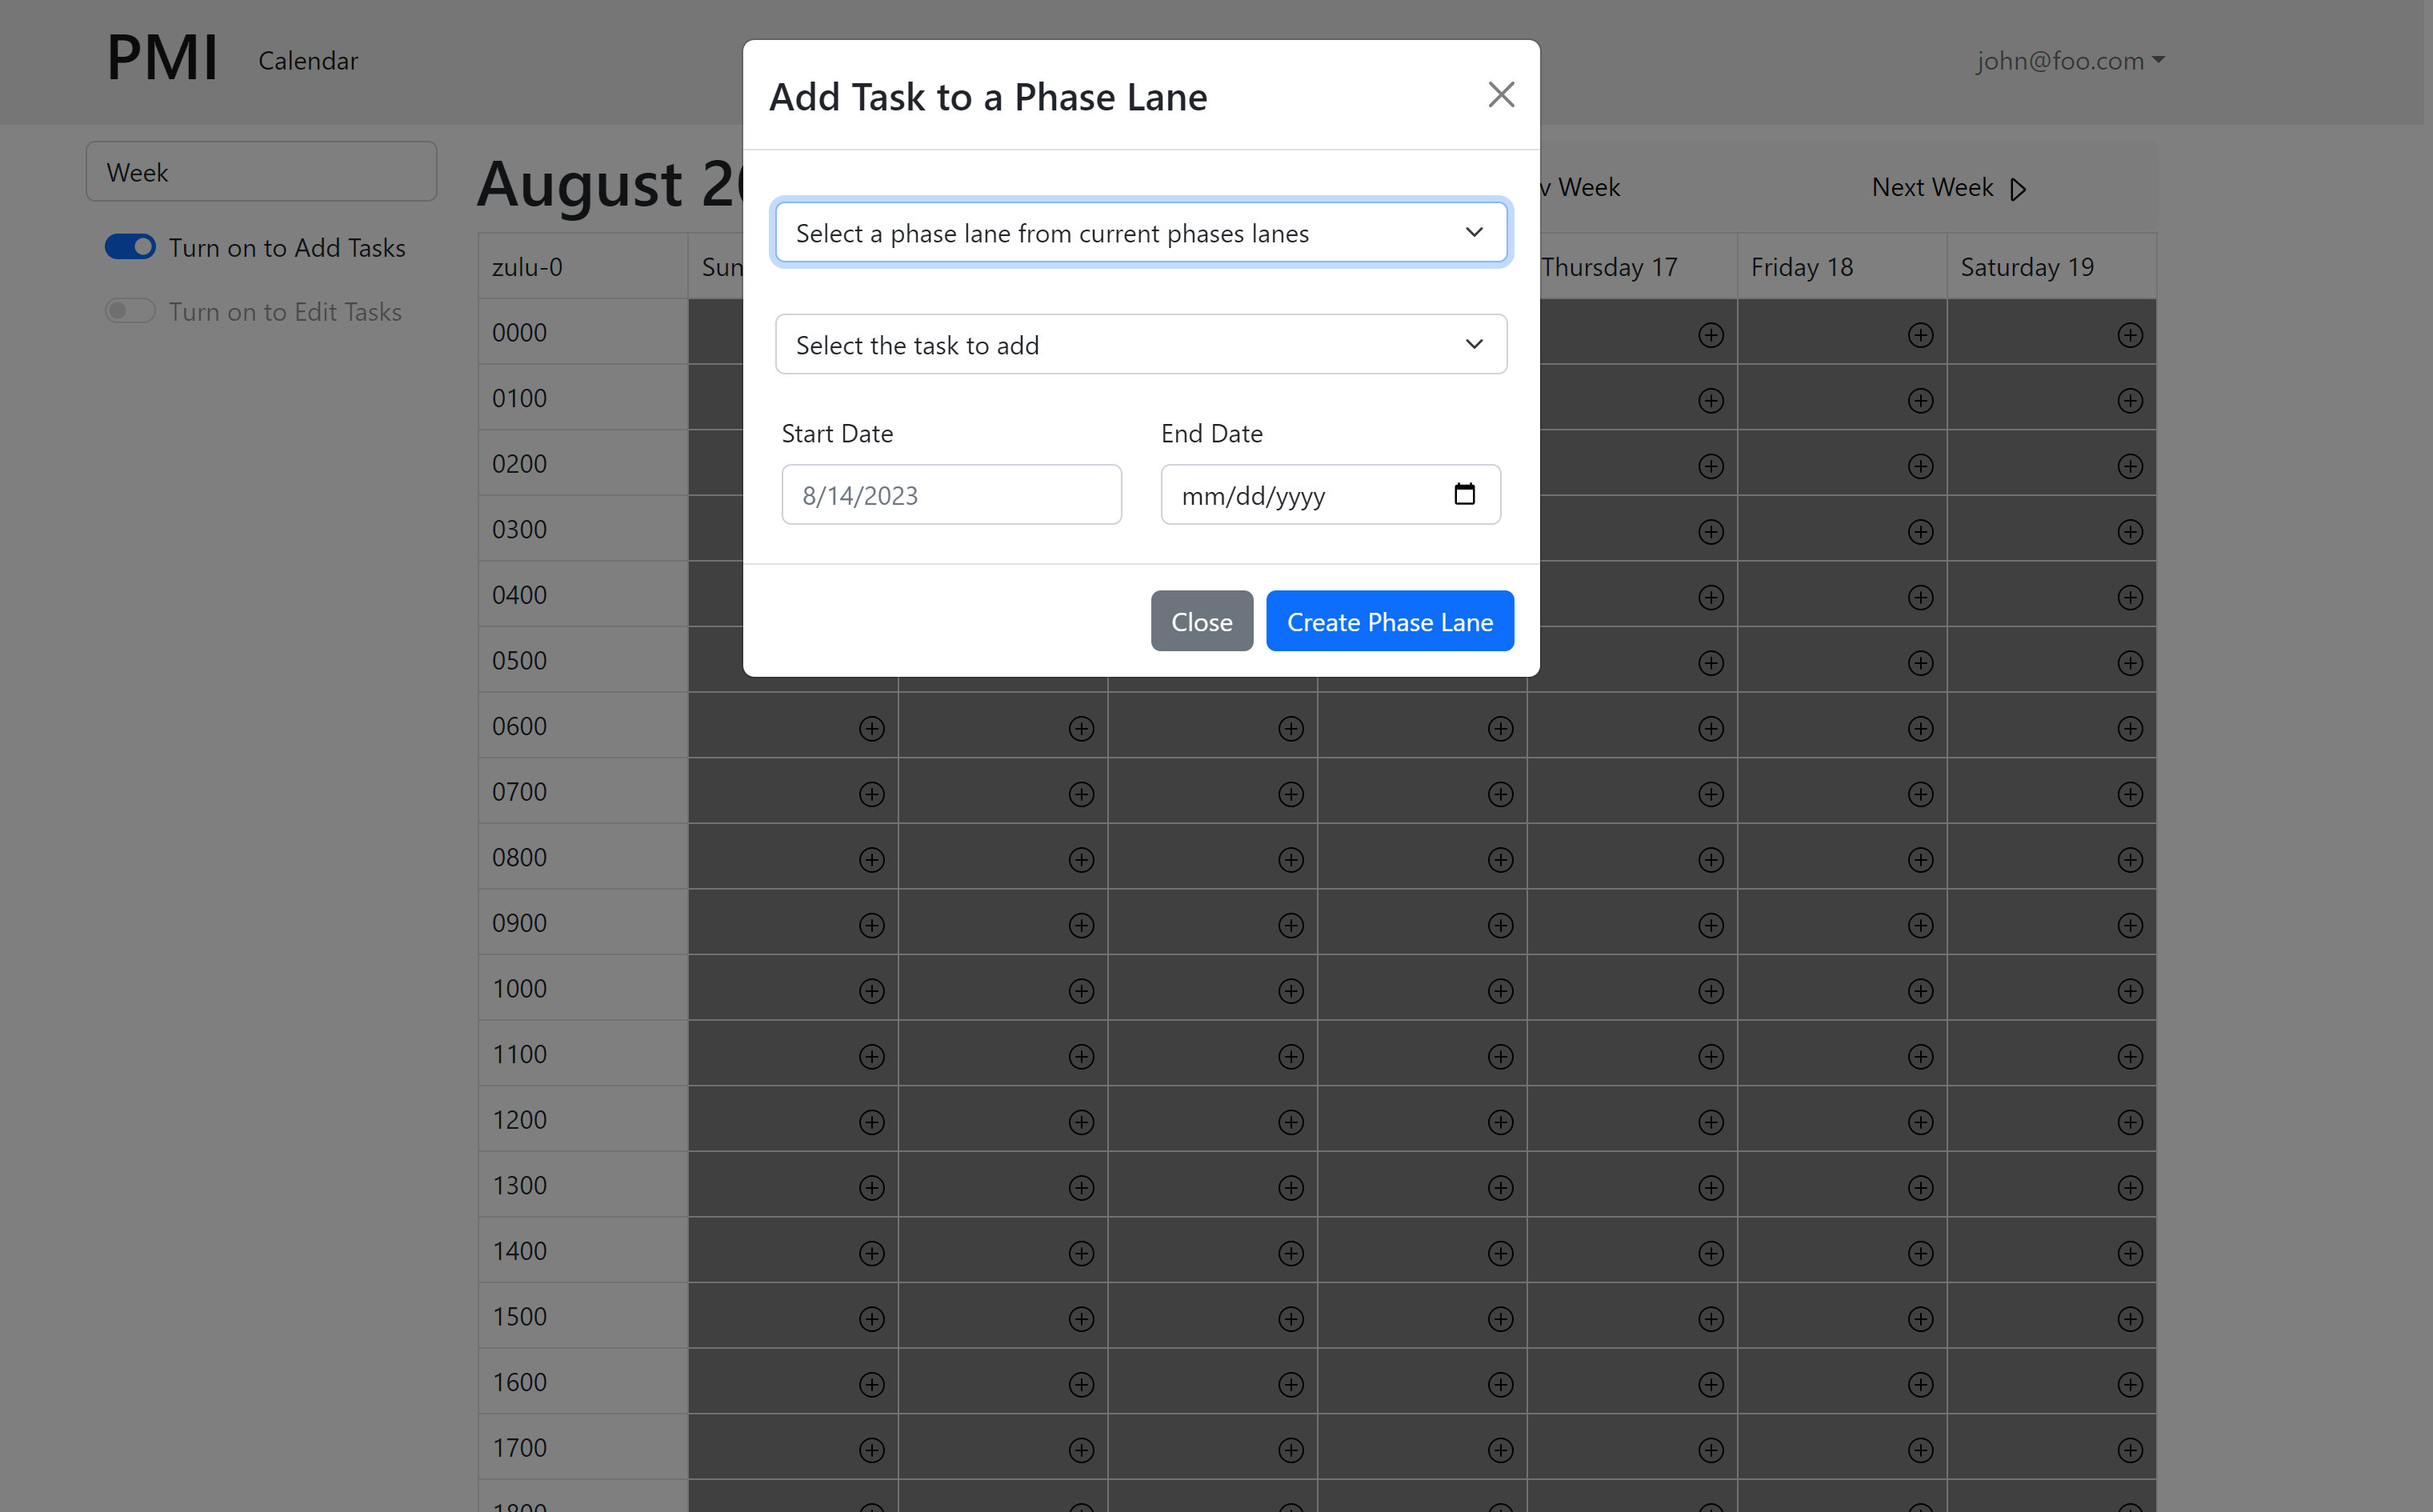
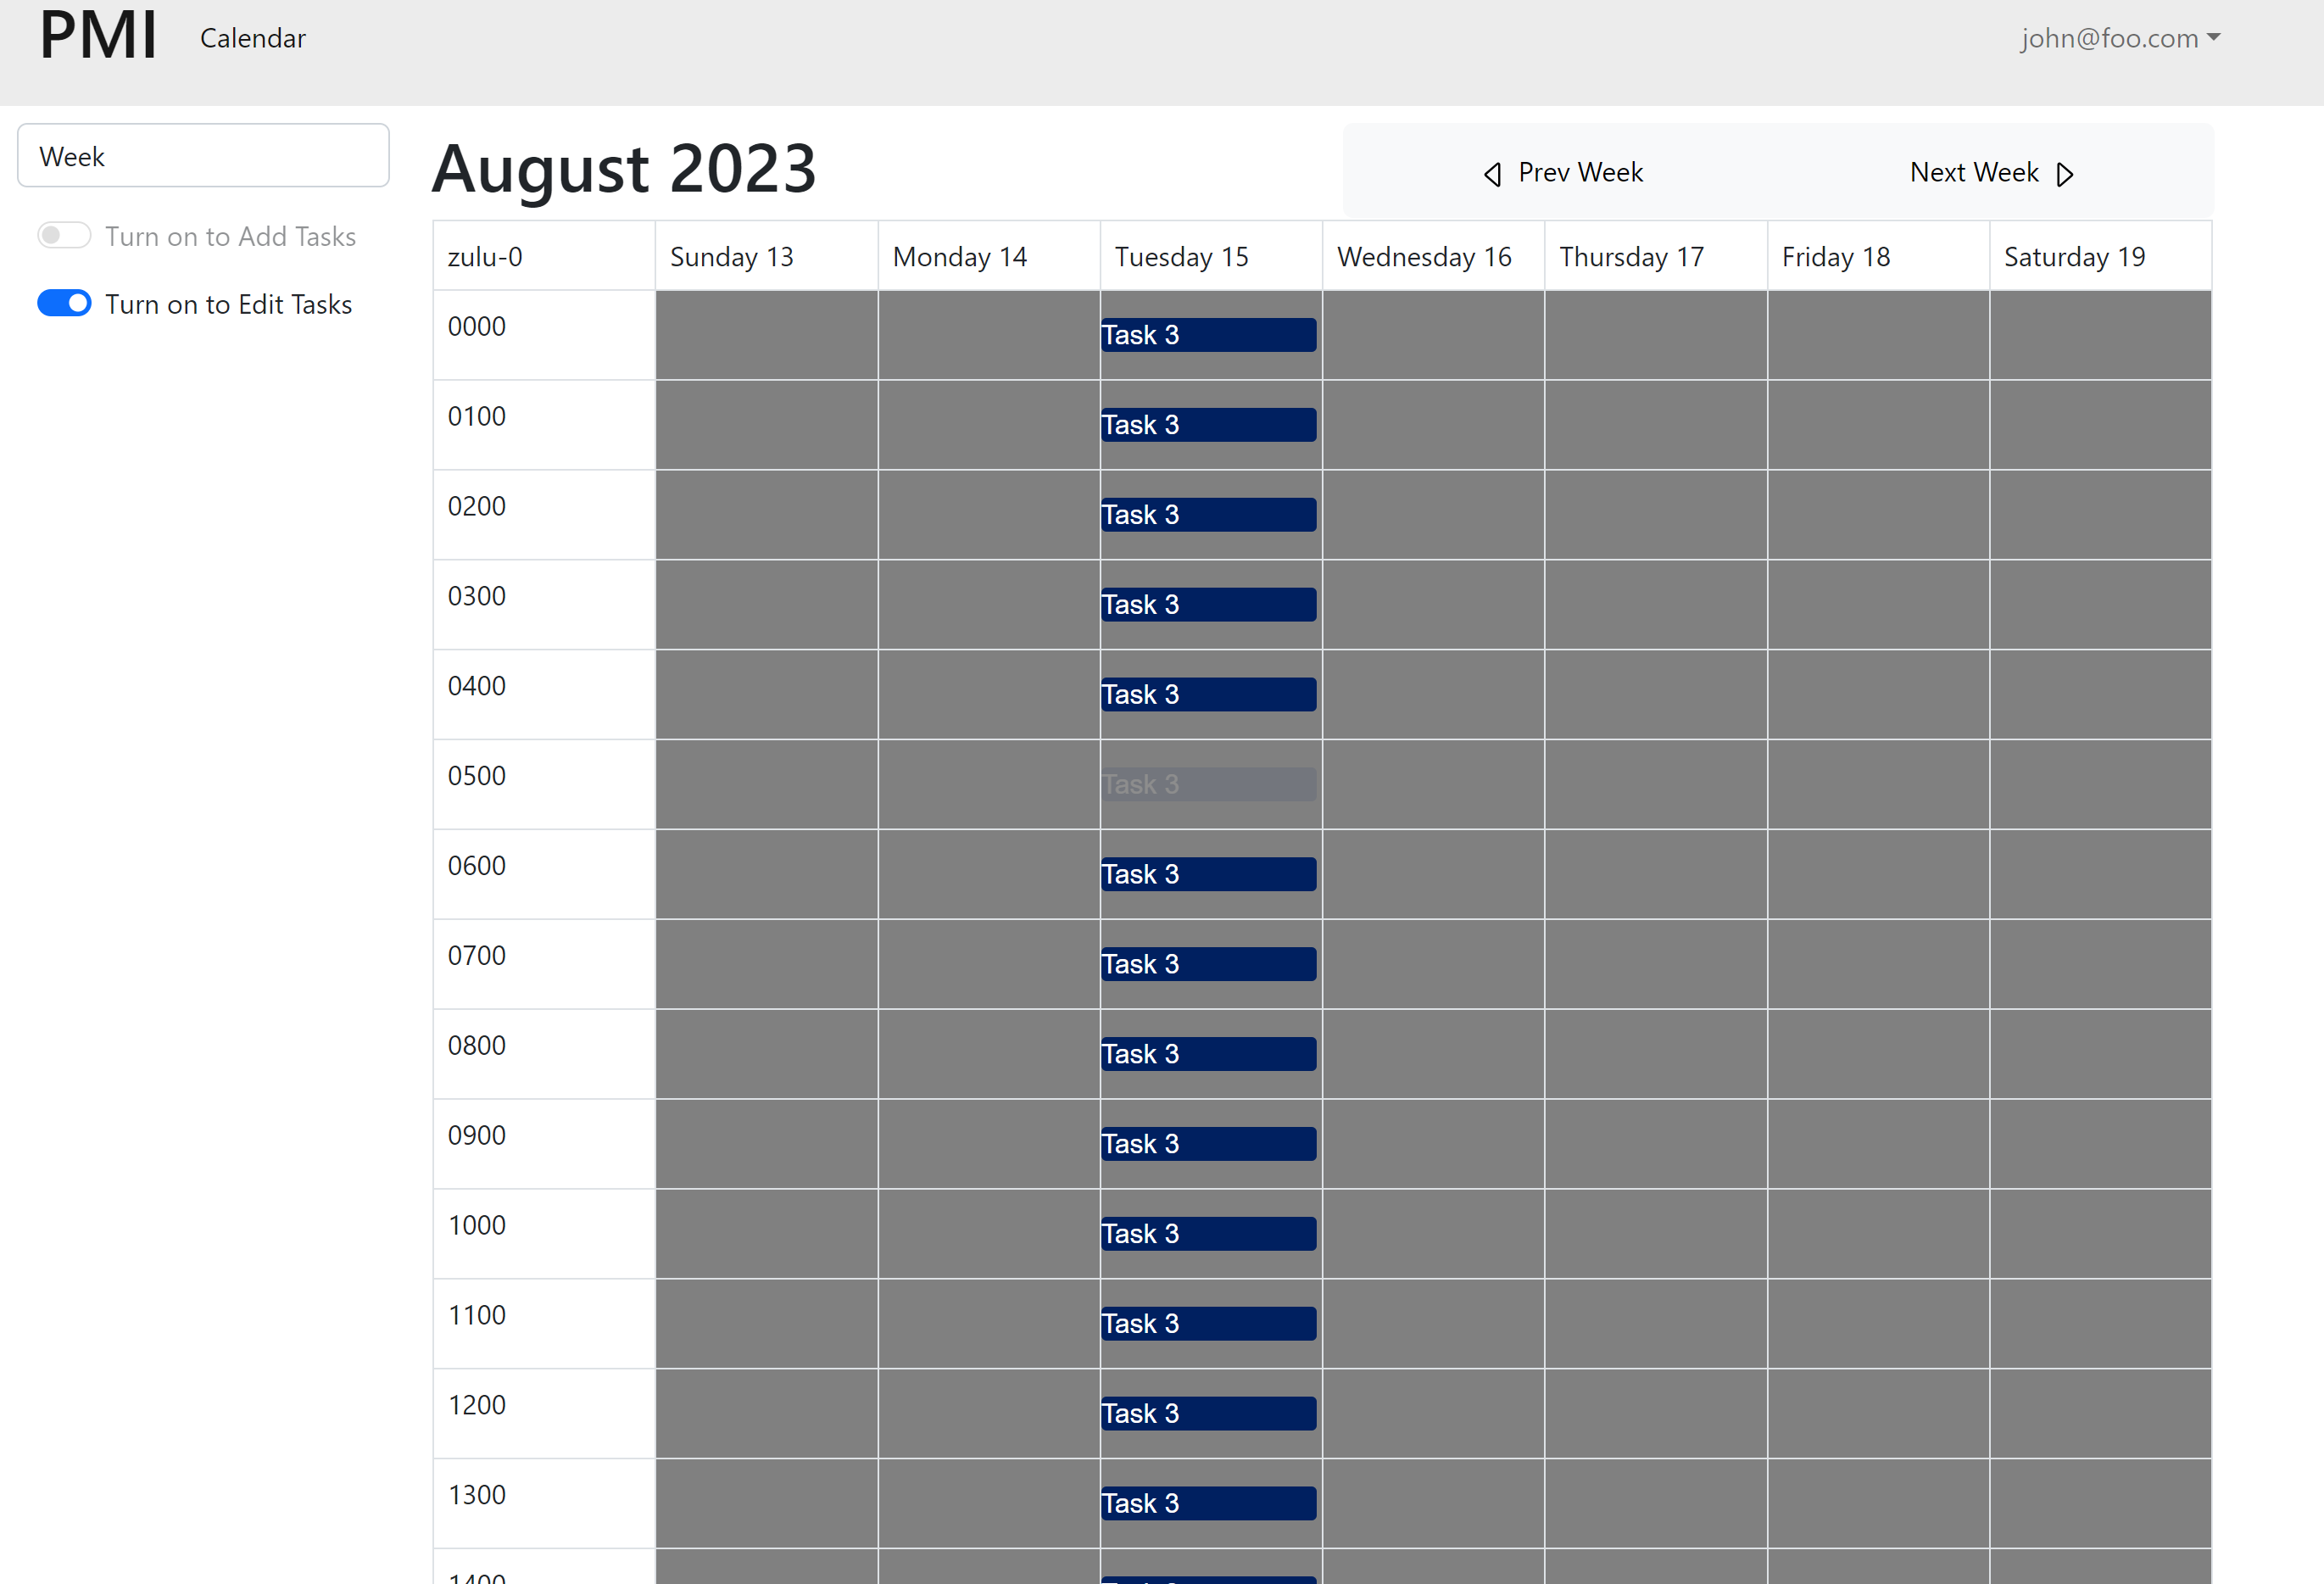
Weekly View
Developer Guide
-
Download a copy of PMI-XFORCE-2023. You can download either using Github Desktop (recommended ) or by extracting the .zip. As the repo is currently private, please contact one of the developers to get the download.
-
Make sure you have Node.js and Meteor installed on your local computer. If not, please install it before you start this project.
-
Another important note, make sure your Node.js version is between 10-14. Downgrade your version if it is too high. Otherwise, you will not able to run this project succesfully.
-
Once you have all the software installed, you can open the project in an code editor.
-
Then open a terminal, nevigate to where the project is.
-
Type
cd appto change directory into the application. -
Run
meteor npm installto install the dependencies. -
Then run
meteor npm run startto build the application and view it. -
Once it is successfully build, you can go to your browser, and type in
http://localhost:3000/to view the application. -
To stop the project, simply press
control-Ctwice in the terminal. -
First time running it might take a while to build it.
-
You can run the project in local or on the private server.
Database Model
Will update soon
Project Development History
To track our progress here based on the issues we completed weekly:
Week 3:
The goal of Week 3:
- Creating the default template for one.
- Then the following days creating at least the ui for the login page.
- By the end of this week at least find a module to use to build a calendar.
To see which issues have been finished during Week 3, please click: Week 3
Note: To access our repo, please contact one of the developers as it is currently private.
Week 4:
The goal of Week 4:
- calendar views
- landing page and admin pages
- general user pages
- Tools to wrap the webapp into desktop app (research)
- add github.io page for documentations
To see which issues have been finished during Week 4, please click: Week 4
Week 5:
The goal of week 5:
- Weekly View completed
- Popup module for weekly view draft completed
- Tests updated
- Monthly view and event display completed
To see which issues have been finished during Week 5, please click Week 5
Week 6:
The goal of week 6:
- add way to edit phase lane events for the yearly and monthly views
- create more tables (data)
- establish the relation between each table
- access control implementation
To see which issues have been finished during Week 6, please click Week 6
Week 7:
The goal of week 7:
- keep working on the calendar views
- base visit to touch basis on what is good and what need to fix
To see which issues have been finished during Week 7, please click Week 7
Week 8:
The goal of week 8:
- Fix the calendar views to mimic the excel sheet that sponsor send
- Create user Dashboard
- try to get the access control done
- Make the documentation about how to set up and run this application with more details.
To see which issues have been finished during Week 8, please click Week 8
Week 9:
The goal of week 9:
- Complete testing
- To add drag and drop functionality to week view
- Finish the presentation for next week (Send the recording by Friday)
- Finish the access control, user dashboard
- Make sure the daily/weekly/monthly/yearly views all meet the sponsors’ needs
- Make sure the GitHub.io page is up to date with everything we have developed so far.
To see which issues have been finished during Week 9, please click Week 9
Week 10:
The goal of Week 10:
- Complete all the exsiting tasks
- Finish any needed testing for the application
- Finish documenting all the pages of the application
- Clean up work for anything as needed
To see which issues have been finished during Week 10, please click Week 10
Deploy the App
As the physical server has not been purchased yet, we will deploy the app to the Digital Ocean which is a cloud web service platform to simulate the process of deployment. It should provides the similar experience.
1. Sign up with Digital Ocean .
2. Create an Ubuntu server (i.e. “droplet”) as the virtual machine.
Then find the Create Droplets page, select the Basic Plan and the most basic CPU:
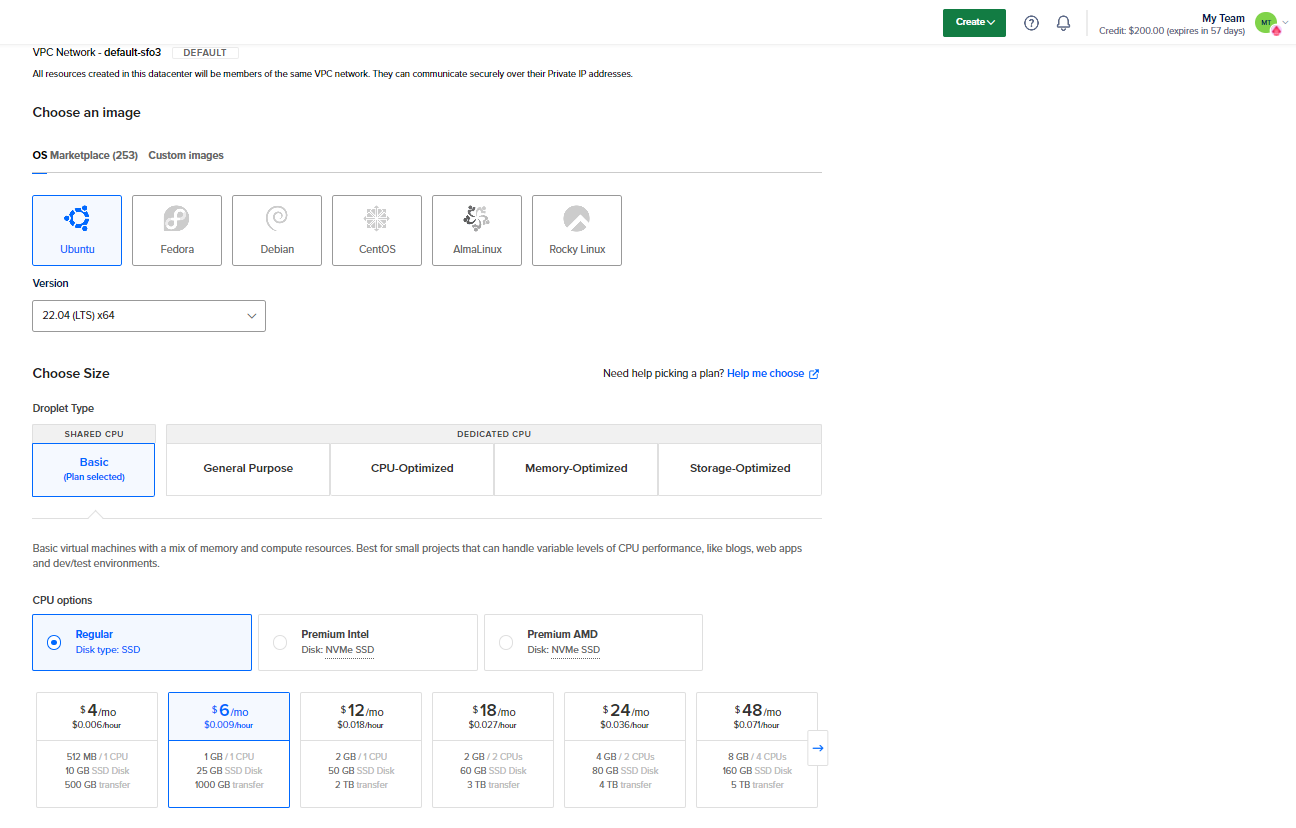 Scroll down and create a root password for your server. (Don’t use SSH keys).
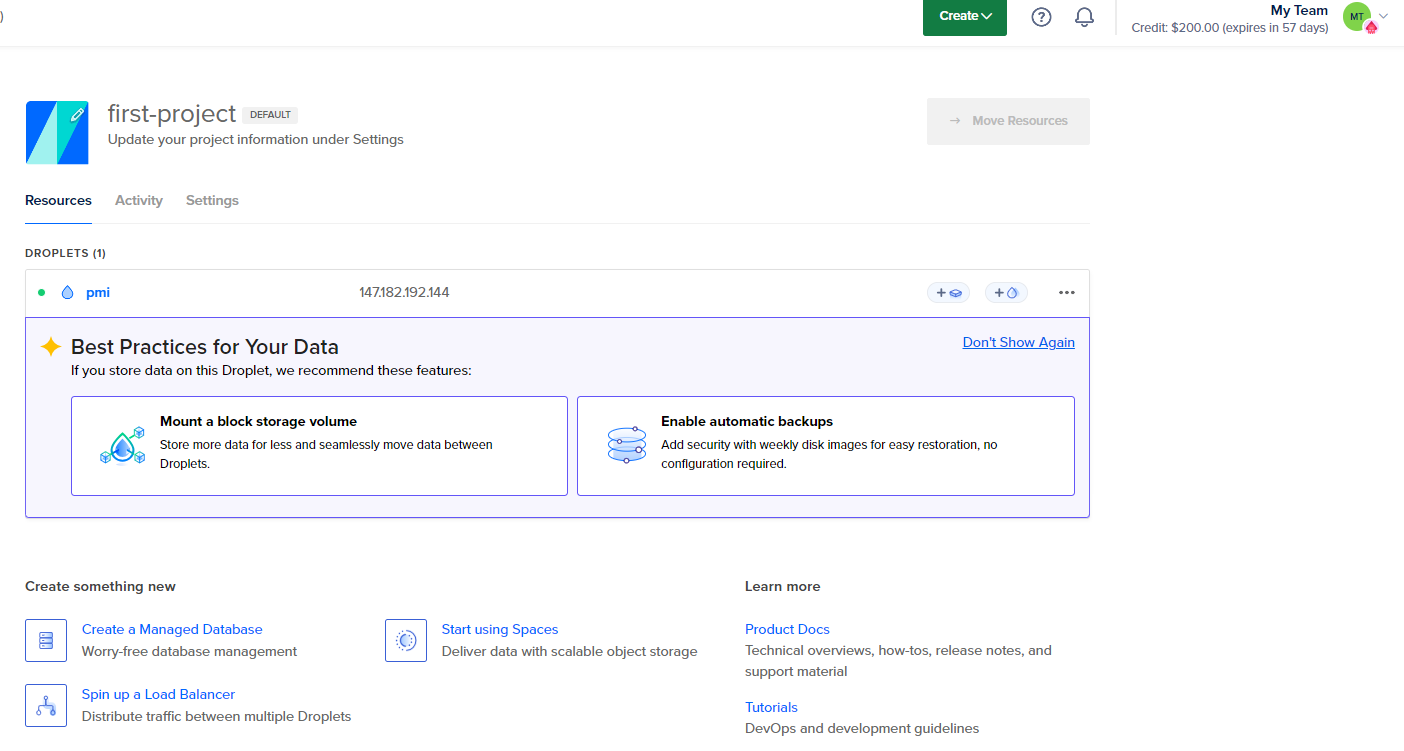
Click “Create Droplet” at the bottom. You will go to a page that shows your newly created droplet:
Local setup
The remainder of this deployment will be done on your laptop.
3. Clone a copy of the repo to your personal GitHub account and then to your laptop.
Next run meteor npm install and meteor npm run start to verify that application runs correctly in you local environment.
(you need to install Meteor first).
4. Install Meteor Up.
Following the directions to install Meteor Up, install Meteor Up onto your laptop by running:
$ npm install --global mup.
5. Create app/.deploy/mup.js and app/.deploy/settings.json.
Create a Project in any editor for your local copy so you can edit files.
In the app/.deploy directory, you’ll find two files: mup.sample.js and settings.sample.json. Make a copy of mup.sample.js called mup.js, and a copy of settings.sample.json called settings.json. When you’re done, the .deploy directory should look like this:
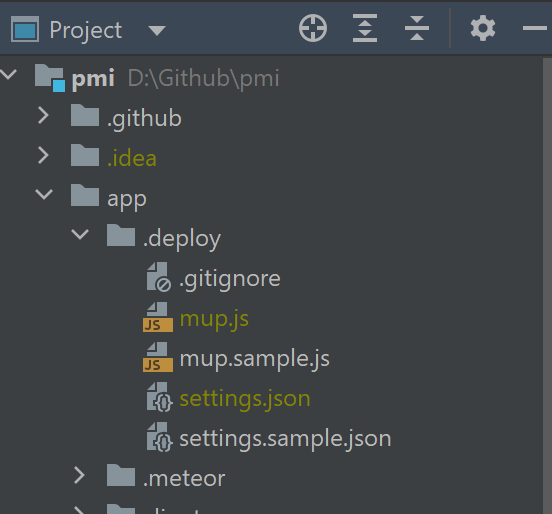
- The files mup.js and settings.json are git-ignored, so you can store credentials in these files without fear of them being accidentially uploaded to GitHub.
6. Initial deployment
To do the initial deployment, you only need to edit mup.js. It starts out looking like this: ```module.exports = { servers: { one: { host: ‘111.222.333.444’, username: ‘root’, password: ‘changeme’ } },
app: { name: ‘meteor-application-template-react’, path: ‘../’,
  servers: {
  one: {},   },
buildOptions: { serverOnly: true, },
env: { ROOT_URL: ‘http://111.222.333.444’, MONGO_URL: ‘mongodb://mongodb/meteor’, MONGO_OPLOG_URL: ‘mongodb://mongodb/local’, },
docker: { image: ‘zodern/meteor:latest’, },
enableUploadProgressBar: true },
mongo: { version: ‘5.0.5’, servers: { one: {} } }, }; ```
There is one occurrence of the string “changeme”, and two occurrences of the string “111.222.333.444”.
Change the string “changeme” (i.e. the server root password) to the Droplet root password you specified above.
Change the string “111.222.333.444” to the IP address associated with this Droplet. (In the screenshots above, the Droplet’s IP address is 147.182.192.144.) Be sure to use the “ipv4” address, not the “Private IP” address!
Note that the “host” value is just the IP address, but the ROOT_URL is “http://” followed by the IP address.
7. Run mup setup.
The next stop is to setup your Droplet to run your Meteor application and MongoDB database. Inside the app/.deploy directory,
invoke mup setup You should get output like the following:
PS D:\Github\pmi\app\.deploy> mup stop

Started TaskList: Stop Meteor
[147.182.192.144] - Stop Meteor
[147.182.192.144] - Stop Meteor: SUCCESS
PS D:\Github\pmi\app\.deploy> mup setup

Started TaskList: Setup Docker
[147.182.192.144] - Setup Docker
[147.182.192.144] - Setup Docker: SUCCESS

Started TaskList: Setup Meteor
[147.182.192.144] - Setup Environment
[147.182.192.144] - Setup Environment: SUCCESS

Started TaskList: Setup Mongo
[147.182.192.144] - Setup Environment
[147.182.192.144] - Setup Environment: SUCCESS
[147.182.192.144] - Copying Mongo Config
[147.182.192.144] - Copying Mongo Config: SUCCESS

Started TaskList: Start Mongo
[147.182.192.144] - Start Mongo
[147.182.192.144] - Start Mongo: SUCCESS

Started TaskList: Setup proxy
[147.182.192.144] - Setup Environment
[147.182.192.144] - Setup Environment: SUCCESS
[147.182.192.144] - Pushing the Startup Script
[147.182.192.144] - Pushing the Startup Script: SUCCESS
[147.182.192.144] - Pushing Nginx Config Template
[147.182.192.144] - Pushing Nginx Config Template: SUCCESS
[147.182.192.144] - Pushing Nginx Config
[147.182.192.144] - Pushing Nginx Config: SUCCESS
[147.182.192.144] - Cleaning Up SSL Certificates
[147.182.192.144] - Cleaning Up SSL Certificates: SUCCESS
[147.182.192.144] - Configure Nginx Upstream
[147.182.192.144] - Configure Nginx Upstream: SUCCESS

Started TaskList: Start proxy
[147.182.192.144] - Start proxy
[147.182.192.144] - Start proxy: SUCCESS

Next, you should run:
mup deploy
For more details on the setup command, see http://meteor-up.com/docs.html#setting-up-a-server.
8. Run mup deploy.
Now you can bundle up your Meteor application, send it over to the Droplet, and start it running on your Droplet.
Inside the app/.deploy directory, invoke mup deploy. You should get output like the following:
PS D:\Github\pmi\app\.deploy> mup deploy
Cleaning Up Previous Builds
Building App Bundle Locally

Started TaskList: Pushing Meteor App
[147.182.192.144] - Pushing Meteor App Bundle to the Server
[147.182.192.144] - Pushing Meteor App Bundle to the Server: SUCCESS

Started TaskList: Prepare App Bundle
[147.182.192.144] - Prepare Bundle
[147.182.192.144] - Prepare Bundle: SUCCESS

Started TaskList: Configuring App
[147.182.192.144] - Pushing the Startup Script
[147.182.192.144] - Pushing the Startup Script: SUCCESS
[147.182.192.144] - Sending Environment Variables
[147.182.192.144] - Sending Environment Variables: SUCCESS

Started TaskList: Start Meteor
[147.182.192.144] - Start Meteor
[147.182.192.144] - Start Meteor: SUCCESS
[147.182.192.144] - Verifying Deployment
[147.182.192.144] - Verifying Deployment: SUCCESS
For more details on the deploy command, see http://meteor-up.com/docs.html#deploying-an-app.
9. View your deployed application.
The meteor-application-template-react application will now be available at http://111.222.333.444, where “111.222.333.444” is replaced by the IP address for your Droplet.
For example:

Caution: avoid two simultaneous deployments!
It is unfortunately easy to deploy your app twice if you change the “name” field in mup.js. Let’s say your mup.js file looks like this:
:
app: {
name: 'pmi',
:
And then you run mup deploy to deploy your application. Now you decide to change the name of your application to, say, ‘grub-n-go’:
:
app: {
name: 'something-else',
:
And you run mup deploy again. Unfortunately, this will result in two versions of your application running at the same time, one called “meteor-application-template-react” and one called “grub-n-go”.
Having two deployments running simultaneously will create really strange, difficult to understand behavior when you visit the site, because sometimes the first version of your application will serve the page, and sometimes the second version will serve the page.
To avoid this situation entirely, make sure that if you change the name of your application in mup.js, you run mup stop first. That way, mup will terminate the process running under the original name, so that when you run mup deploy after editing mup.js, there will only be one deployed application.
If you are in the situation where there are two deployments running simultaneously, it’s easy to fix. First, edit mup.js to restore the original name, then run mup stop to stop that process. Finally, edit mup.js back to the new name and run mup deploy again, then run mup logs to ensure that everything is OK.
MongoDB database inspect and control
Once you’ve deployed your Meteor application to Digital Ocean, one very important capability is to inspect the contents of the production database. A simple way to do this is to use Robo3T.
We’ll assume in these instructions that you’ve deployed a copy of PMI to Digital Ocean following the instructions above.
1. Install Robo3T
The first step is to download and install Robo3T on your laptop. These instructions are for Studio 3T.
2. Setup a connection
After downloading and installing Robo3T, you must set up a connection that includes port forwarding to the production MongoDB service.
First, create a new connection and choose manually configure connection setting and name it appropriately:
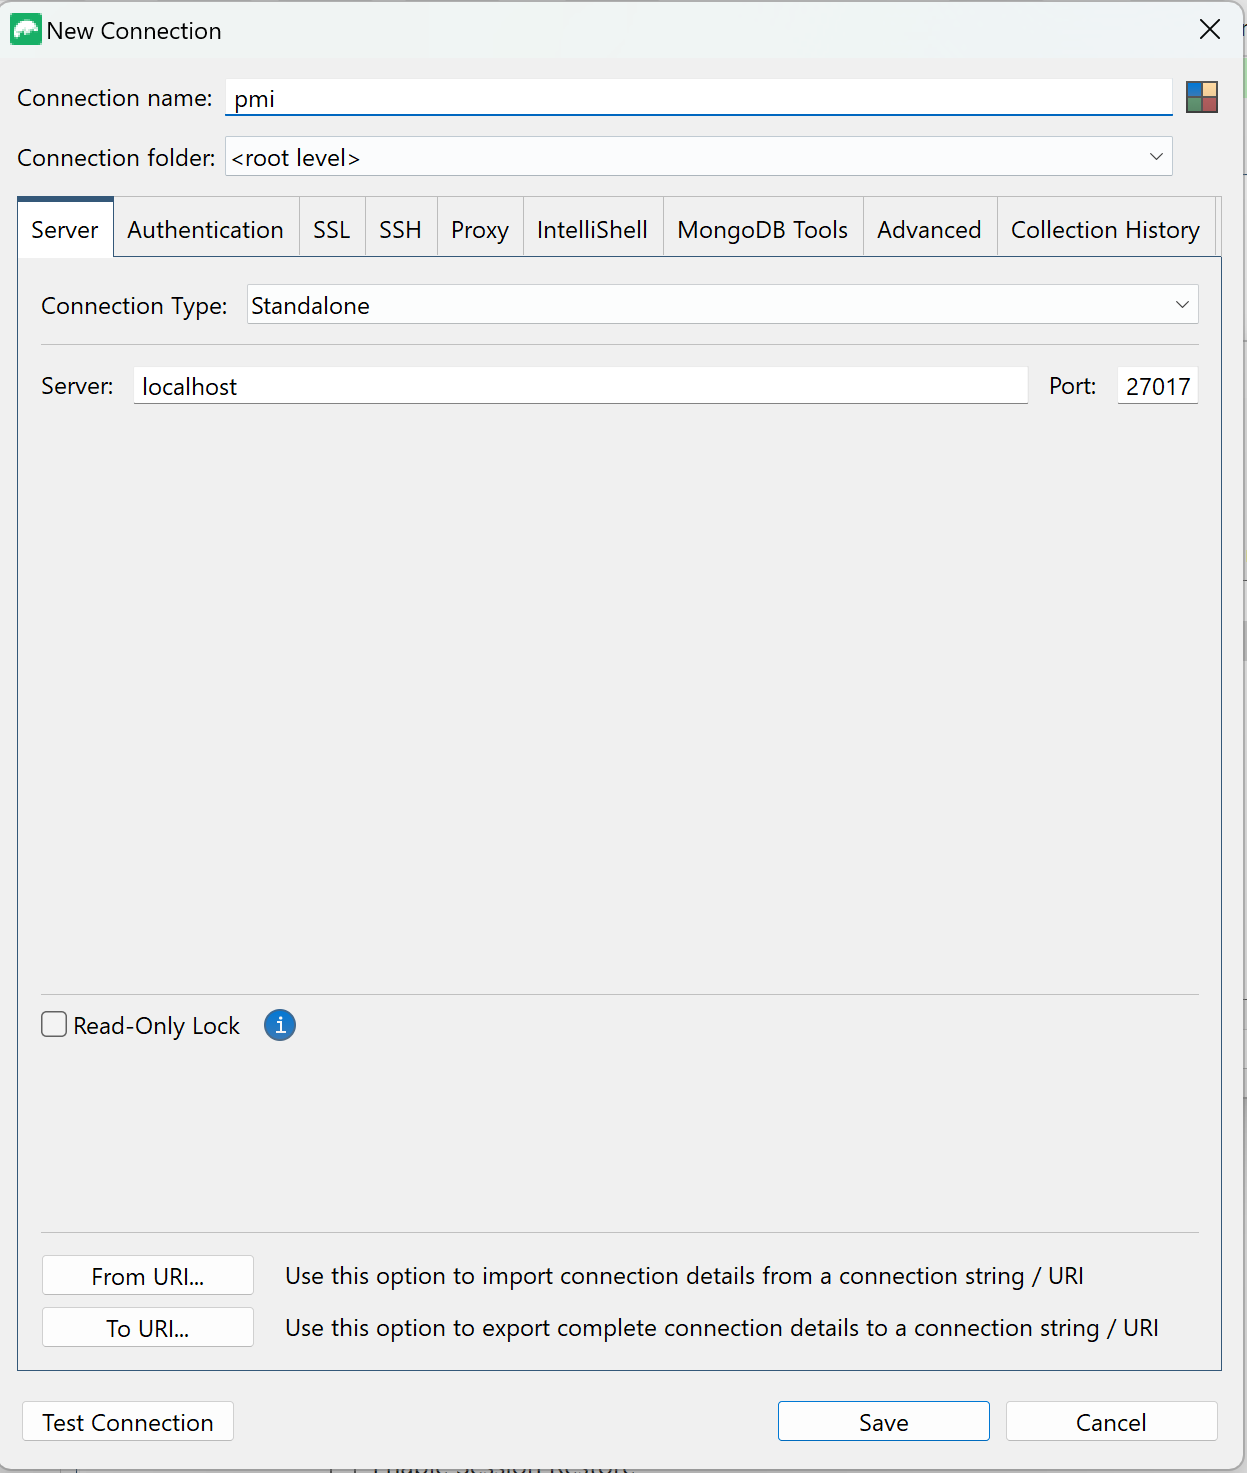
Next, click on the “SSH” tab. Check the “Use SSH Tunnel” checkbox, then select “Password” as the SSH authorization method, then supply the IP address, “root” as the username, and the root password that you created in Digital Ocean:

You can click “Test Connection” to check your connection at this point. It should result in the following window:
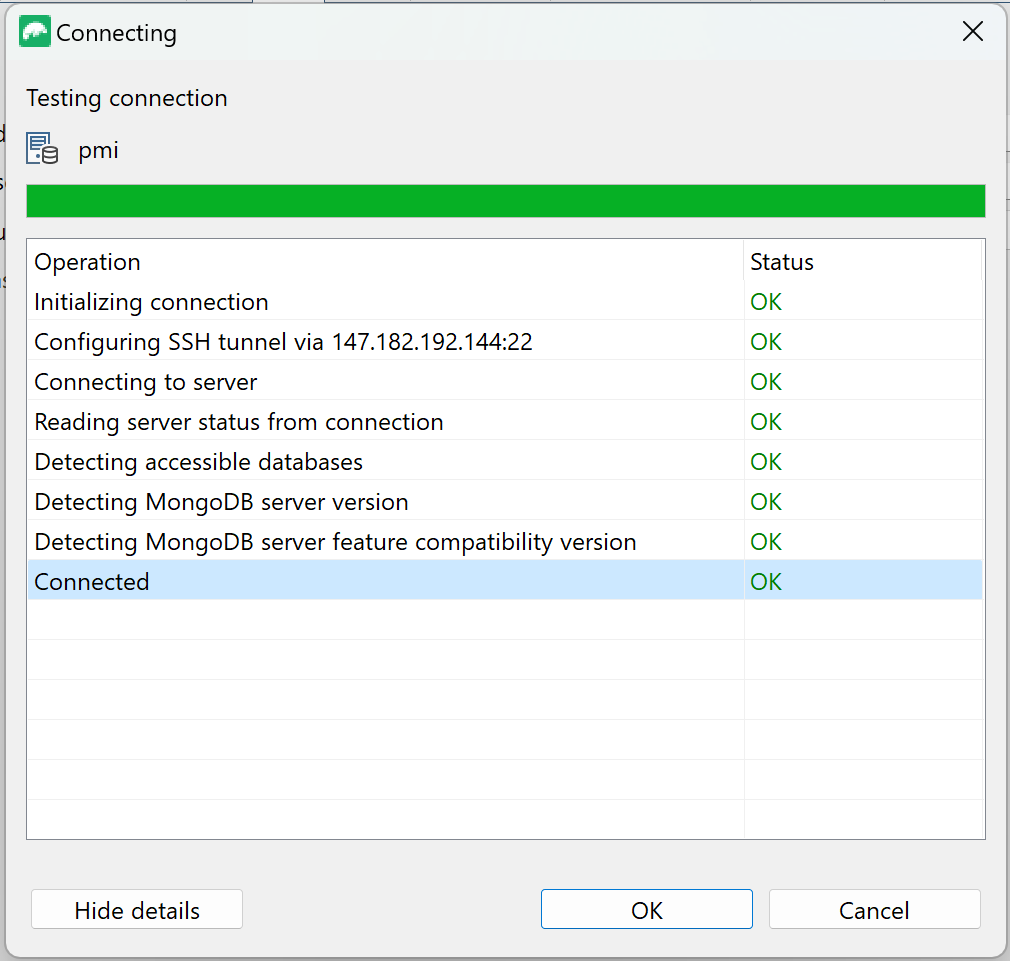
If everything is OK, then click Save, and now your connection should show up in the Connections panel:
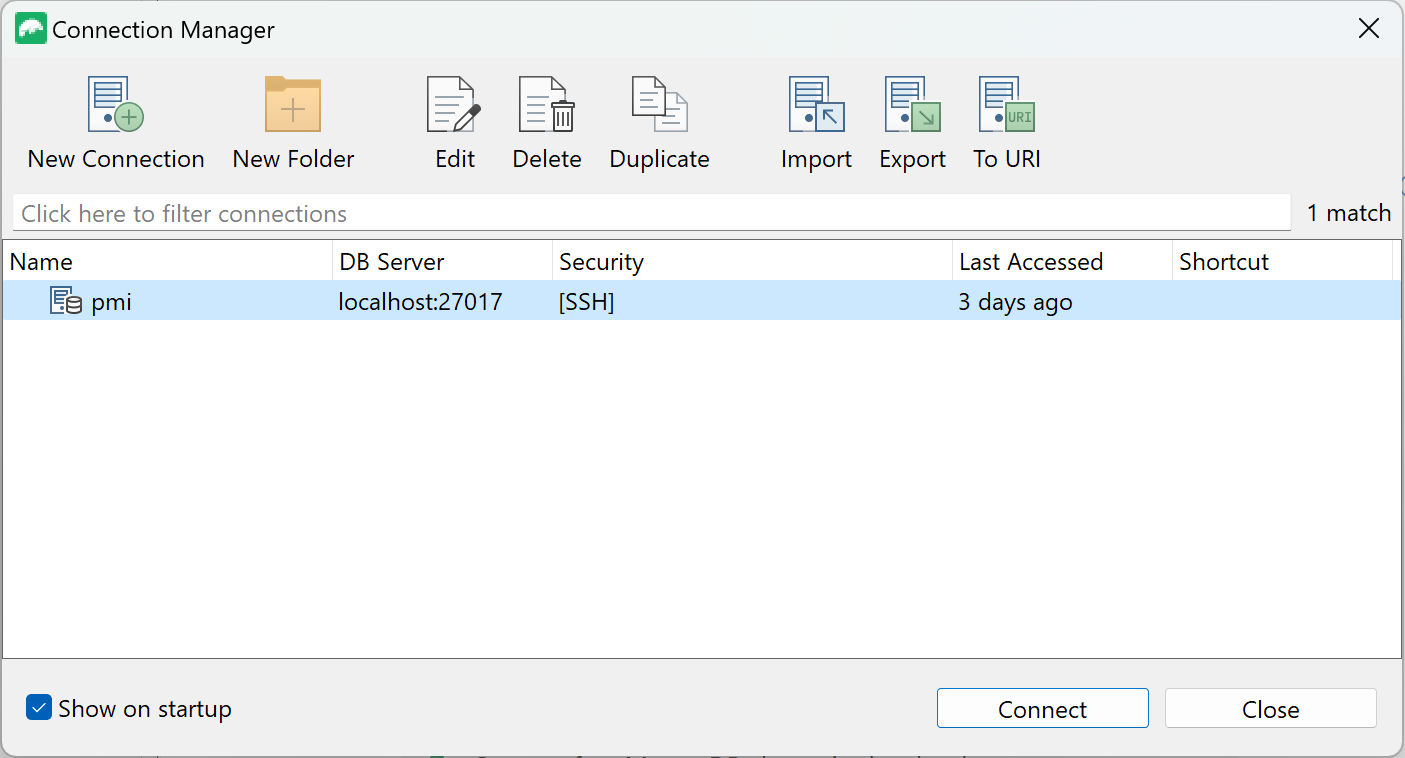
3. Connect to the MongoDB database
Once your connection is setup, double click to open a connection to the production database at Digital Ocean and display the contents:

Developers
Here are the people who worked on this project:
Hangbo Zhang: Find his Github here.
Trevor Kansaki: Find his Github here.
Pauline Peihan Wu: Find her Github here.
Thane Luna: Find his Github here.